 Printable View (361 KB)
TSB
06-14-10
06-14-10
- ENGINE/TRANSMISSION DRIVEABILITY ISSUES
|
Printable View (361 KB)
| |
TSB 06-14-10 |
|
| Publication Date: July 5, 2006 | |
FORD: | 1999-2003 Windstar 2004-2007 Freestar |
MERCURY: | 2004-2007 Monterey |
This article supersedes TSB 05-23-7 to update the Service Procedure and model years.
Some 1999-2003 Windstar and 2004-2007 Freestar / Monterey vehicles built prior to 6/22/2006 may exhibit engine / transmission driveability issues due to water entering the powertrain control module (PCM) or transaxle vent. Symptoms may include various diagnostic trouble codes (DTCs), harsh or delayed transmission shifts / engagements, no reverse engagement, engine overheat, engine lean condition causing a misfire (possibly leading to melted electrodes on the spark plugs), and rough idle. The water leakage may be due to the PCM connector cover not seating completely and water leaking down from the cowl panel grille (cowl top vent panel) area.
During normal diagnostic and repair procedures, inspect for evidence of water damage at the PCM, PCM connector, and/or transaxle. If present, inspect the sealing area of the PCM cover, seal the water leak path in the cowl panel grill area, and service the PCM as needed per the following Service Procedure.
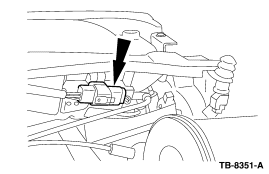
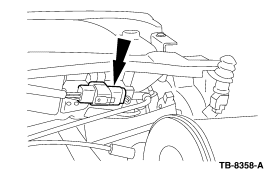
Disconnect the PCM connector. Remove the PCM cover from the studs in the bulkhead. (Figure 1)
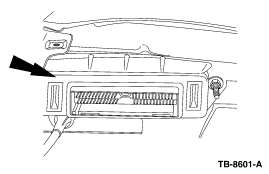
Figure 1 - Article 06-14-10
Inspect the body sealant on the bulkhead to ensure it is not protruding out causing the cover not to seal properly in that area. (Figure 2) If sealant is interferring with the PCM cover, remove excess with a sharp tool. Reinstall the PCM cover ensuring the cover seals and is flush with the bulkhead.
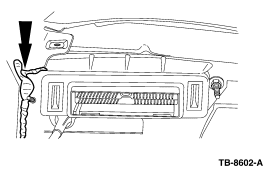
Figure 2 - Article 06-14-10
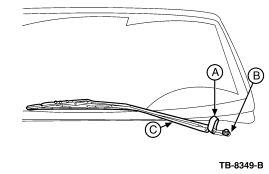
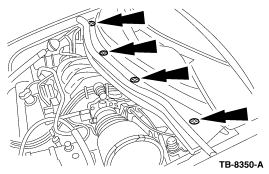
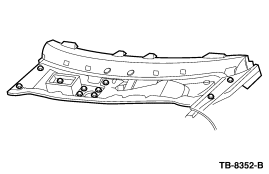
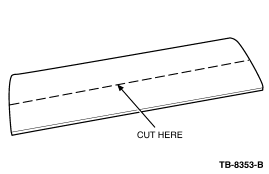
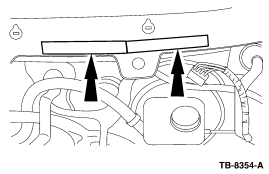
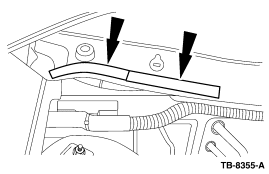
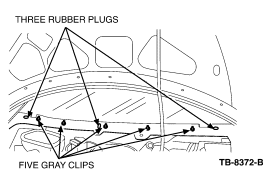
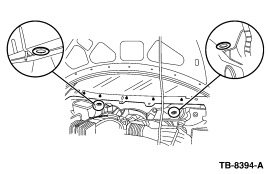
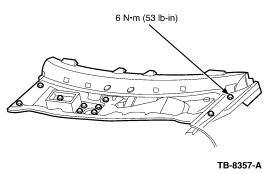
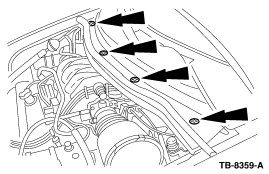
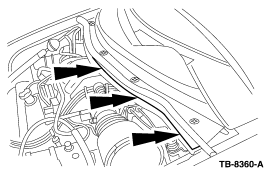
| NOTE: | APPLY THREADLOCK TO THE PIVOT ARM NUT. |
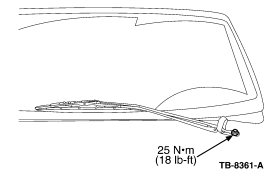
Figure 16 - Article 06-14-10
| PART NUMBER | PART NAME |
|---|---|
| N806322-S | Pushpin Screw/Rivet (4 per repair) |
| TA-32 | Clear Silicone Rubber |
| TA-26 | Threadlock 262 |
| 164-R4901 | PVC Soft Foam Adhesive Stripes - Rotunda Part (2 per repair) |
Eligible Under Provisions Of New Vehicle Limited Warranty Coverage
| OPERATION | DESCRIPTION | TIME |
|---|---|---|
| 061410A | 2004-2007 Freestar/Monterey, 1999-2003 Windstar: Inspect And Seal The Cowl Panel Grill Area (Do Not Use With 17526A, 17566A, 17508A, 17603A) | 1.0 Hr. |
| MT061410 | Claim Additional Labor Required As Actual Time Or Use SLTS Operation If Available | Actual Time |
| BASIC PART NO. | CONDITION CODE |
|---|---|
| 7002030 | 68 |
NOTE: The information in Technical Service Bulletins is intended for use by trained, professional technicians with the knowledge, tools, and equipment to do the job properly and safely. It informs these technicians of conditions that may occur on some vehicles, or provides information that could assist in proper vehicle service. The procedures should not be performed by "do-it-yourselfers". Do not assume that a condition described affects your car or truck. Contact a Ford, Lincoln, or Mercury dealership to determine whether the Bulletin applies to your vehicle. Warranty Policy and Extended Service Plan documentation determine Warranty and/or Extended Service Plan coverage unless stated otherwise in the TSB article. The information in this Technical Service Bulletin (TSB) was current at the time of printing. Ford Motor Company reserves the right to supercede this information with updates. The most recent information is available through Ford Motor Company's on-line technical resources.
Copyright © 2006 Ford Motor Company