
Changing a Road Wheel


Locking lug nuts
You can obtain a replacement locking lug nut key and replacement locking lug nuts from your dealer using the reference number certificate.
Vehicles with a temporary spare wheel
 WARNING:
Do not exceed 80 km/h (50 mph).
WARNING:
Drive the shortest possible distances.
WARNING:
Do not fit more than one spare wheel on your vehicle at any one time.
WARNING:
Do not use snow chains on this type of wheel.
WARNING:
Do not drive through an automatic car wash.
WARNING:
Do not carry out any tire repairs on a temporary spare wheel.
WARNING:
Do not exceed 80 km/h (50 mph).
WARNING:
Drive the shortest possible distances.
WARNING:
Do not fit more than one spare wheel on your vehicle at any one time.
WARNING:
Do not use snow chains on this type of wheel.
WARNING:
Do not drive through an automatic car wash.
WARNING:
Do not carry out any tire repairs on a temporary spare wheel. |
 CAUTION:
The ground clearance of your vehicle will be reduced. Take care when parking next to a kerb.
CAUTION:
The ground clearance of your vehicle will be reduced. Take care when parking next to a kerb. |
Note:
Your vehicle may exhibit some unusual driving characteristics.
Vehicle jack
|
WARNING:
The vehicle jack supplied with your vehicle should only be used when changing a wheel in emergency situations.
WARNING:
Before using the vehicle jack, check that it is not damaged or deformed and that the thread is lubricated and free from foreign matter.
WARNING:
Never place anything between the jack and the ground, or the jack and the vehicle. |
Note:
Vehicles with a tire repair kit are not equipped with a vehicle jack or a wheel brace.
It is recommended to use a workshop type hydraulic jack for changing between summer and winter tires.
Note:
Use a jack with a minimum lifting capacity of 1.5 tonnes and a lifting plate with a minimum diameter of 80 millimeters (3.1 inches).
Vehicles without tire repair kit
| A B C |
Your vehicle jack and wheel brace are located in the spare wheel well.
Jacking and lifting points
|
CAUTION:
Use only the specified jacking points. If you use other positions, you may damage the body, steering, suspension, engine, braking system or the fuel lines. |
| A B |
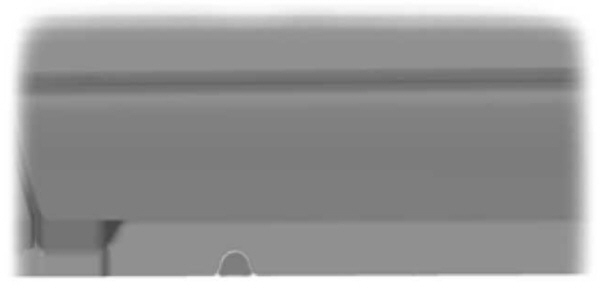
Indentations in the sills A show the location of the jacking points.
Vehicles with side skirts
Assembling the wheel brace
Type one
|
WARNING:
When returning the wheel brace extension to its original position, take care not to get your fingers caught. |
Note:
Make sure that the wheel brace is fully extended.
Extend the wheel brace.
Type two
|
CAUTION:
The screw-in towing eye has a left-hand thread. Turn it counterclockwise to install it. Make sure that the towing eye is fully tightened. |
The screw-in towing eye is located in the spare wheel well.
Insert the screw-in towing eye into the wheel brace.
Removing the wheel trim
Type one
Insert the flat end of the wheel brace between the rim and the trim and carefully remove the trim.
Type two
- Insert the wheel trim remover.
- Remove the wheel trim.
Note:
Make sure that you pull the wheel trim remover at right angles to the trim.
Removing a road wheel
|
WARNING:
Park your vehicle in such a position that neither the traffic nor you are hindered or endangered.
WARNING:
Set up a warning triangle.
WARNING:
Make sure that the vehicle is on firm, level ground with the wheels pointing straight ahead.
WARNING:
Switch off the ignition and apply the parking brake.
WARNING:
If your vehicle has a manual transmission, select first or reverse gear. If it has an automatic transmission, select park.
WARNING:
Have the passengers leave the vehicle.
WARNING:
Secure the diagonally opposite wheel with an appropriate block or wheel chock.
WARNING:
Make sure that the arrows on directional tires point in the direction of rotation when the vehicle is moving forwards. If you have to fit a spare wheel with the arrows pointing in the opposite direction, have the tire refitted in the correct direction by a properly trained technician.
WARNING:
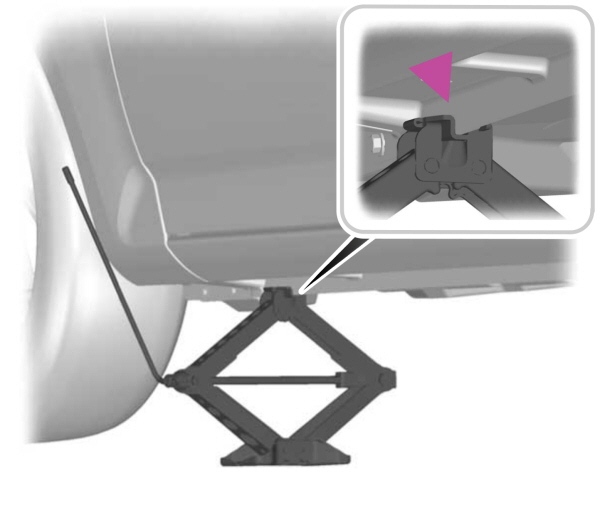
Do not work underneath the vehicle when it is supported only by a jack.
WARNING:
Make sure that the jack is vertical to the jacking point and the base is flat on the ground. |
|
CAUTION:
Do not lay alloy wheels face down on the ground, this will damage the paint. |
Note:
The spare wheel is located under the floor cover in the luggage compartment.
- Install the locking lug nut key.
- Slacken the lug nuts.
- Jack up the vehicle until the tire is clear of the ground.
- Remove the lug nuts and the wheel.
Installing a road wheel
|
WARNING:
Use only approved wheel and tire sizes. Using other sizes could damage the vehicle and will make the National Type Approval invalid. See
Technical Specifications.
WARNING:
Do not fit run flat tires on vehicles that were not originally fitted with them. Please contact your dealer for more details regarding compatibility. |
|
CAUTION:
Do not install alloy wheels using lug nuts designed for use with steel wheels. |
Note:
The lug nuts of alloy wheels and spoked steel wheels can also be used for the steel spare wheel for a short time (maximum two weeks).
Note:
Make sure the wheel and hub contact surfaces are free from foreign matter.
Note:
Make sure that the cones on the lug nuts are against the wheel.
- Install the wheel.
- Install the lug nuts finger tight.
- Install the locking lug nut key.
- Partially tighten the lug nuts in the sequence shown.
- Lower the vehicle and remove the jack.
- Fully tighten the lug nuts in the sequence shown. See Technical Specifications.
- Install the hub cap or cover using the ball of your hand.
|
WARNING:
Have the lug nuts checked for tightness and the tire pressure checked as soon as possible. |