
This view of the Owner’s Manual contains the very latest information, which may vary slightly from the printed Owner’s Manual originally provided with your vehicle. It may also describe content that is not on or operates differently on your vehicle. Please consider the Owner’s Manual originally provided with your vehicle as the primary source of information for your vehicle.

The information contained in this publication was correct at the time of release.In the interest of continuous development, we reserve the right to change specifications, design or equipment at any time without notice or obligation.No part of this publication may be reproduced, transmitted, stored in a retrieval system or translated into any language in any form by any means without our written permission.Errors and omissions excepted.
Copyright © 2024 Ford Motor Company
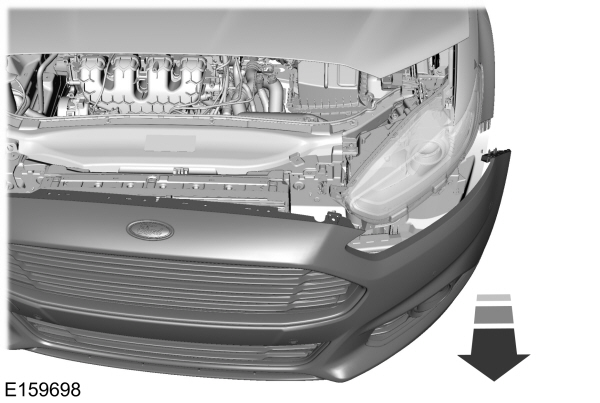
Removing a Headlamp


Note:
To remove push pins, use a flat-bladed screwdriver to pull up the center release pin.
- Make sure the headlamp control is in the off position and open the hood.
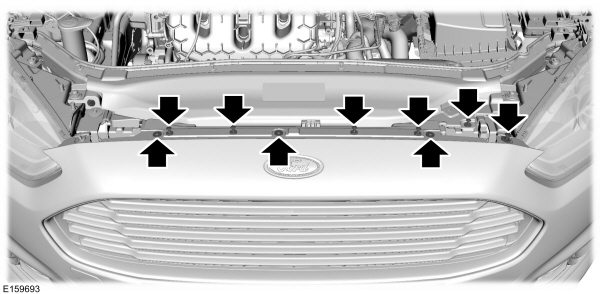
- Remove the six push pins securing the front fascia to the front trim cover.
- Remove the three bumper cover upper screws using a flat-bladed screwdriver.
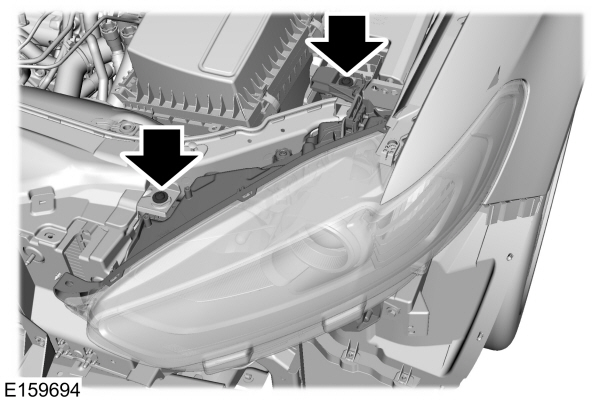
- Remove the push pin at the inboard side of the headlamp you are servicing.
- Remove the two screws securing the headlamp using a flat-bladed screwdriver.
- Remove the lower three wheel housing fasteners by turning them counterclockwise.
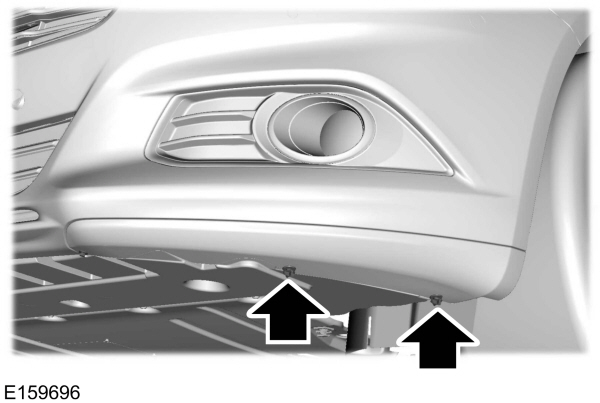
- Remove the two outmost front bumper cover lower fasteners, only on the side of the headlamp you are servicing, by turning them counterclockwise.
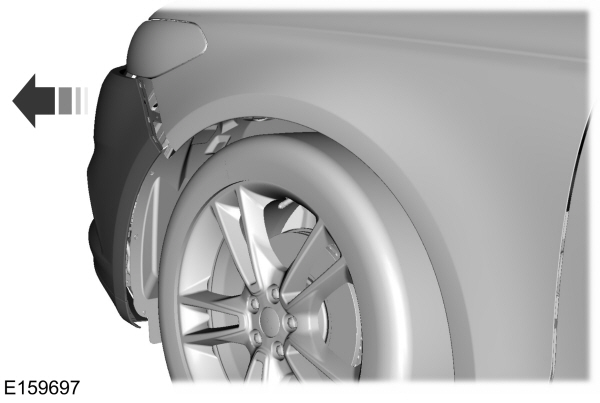
- Separate the front bumper cover from the fender by gently pulling the front bumper cover to the outside of the vehicle 1.2 in (3 cm).
- From the front of the vehicle, gently pull the front bumper cover forward 4 in (10 cm) by grasping it next to the headlamp to be serviced and in the lower front of the wheel opening.
- Gently pull the headlamp assembly outward to disengage it from the lower fixing point.
- Carefully lift the headlamp and remove it from the vehicle.
- Disconnect the electrical connector from the headlamp assembly by pushing the release tab on the connector.
Thank You For Your Feedback