
This view of the Owner's Manual contains the very latest information, which may vary slightly from the printed Owner's Manual originally provided with your vehicle. It may also describe content that is not on or operates differently on your vehicle. Please consider the Owner's Manual originally provided with your vehicle as the primary source of information for your vehicle.

The information contained in this publication was correct at the time of release.In the interest of continuous development, we reserve the right to change specifications, design or equipment at any time without notice or obligation.No part of this publication may be reproduced, transmitted, stored in a retrieval system or translated into any language in any form by any means without our written permission.Errors and omissions excepted.
Copyright © 2024 Ford Motor Company
Changing the Engine Air Filter
 WARNING:
To reduce the risk of vehicle damage and personal burn injuries, do not start your engine with the air cleaner removed and do not remove it while the engine is running.
WARNING:
To reduce the risk of vehicle damage and personal burn injuries, do not start your engine with the air cleaner removed and do not remove it while the engine is running. |
When changing the air filter element, use only the air filter element listed in the Motorcraft Parts table. See
Motorcraft Parts - 2.0L.
When servicing the air cleaner on vehicles with a turbocharger, it is important that no foreign material enter the air induction system. The engine and turbocharger are susceptible to damage from even small particles.
Change the air filter element at the proper interval. See
Scheduled Maintenance.
Note:
Failure to use the correct air filter element may result in severe engine damage.The customer warranty may be void for any damage to the engine if the correct air filter element is not used.
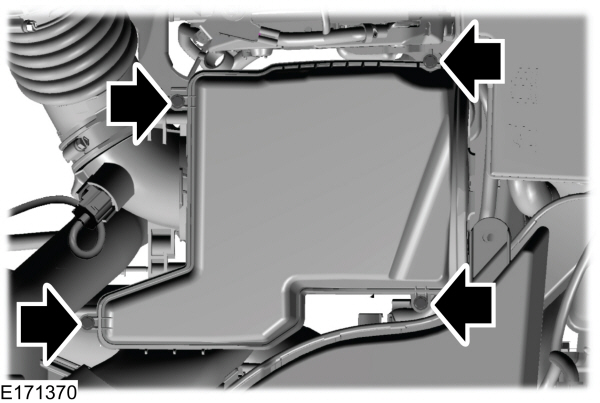
- Loosen the four fasteners and remove the air cleaner assembly lid.
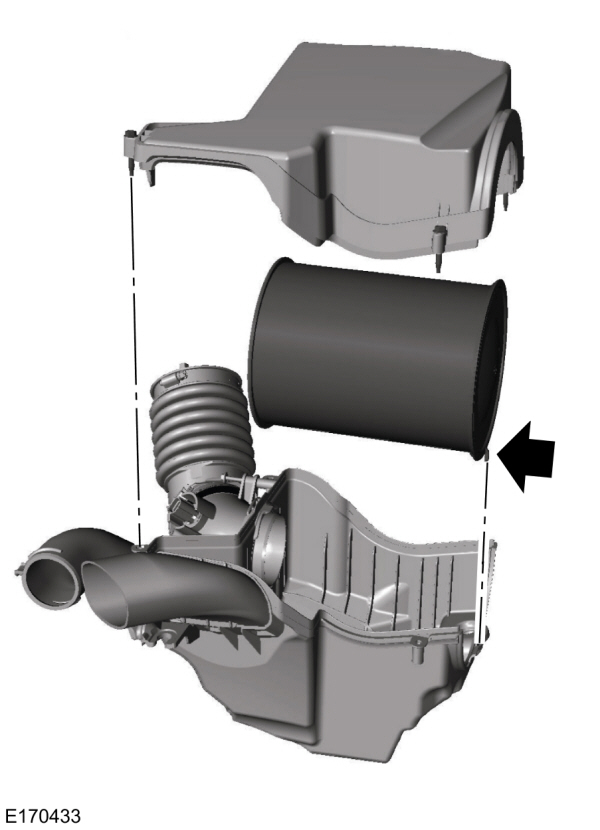
- Remove the air filter element from the air filter housing.
- Wipe any dirt or debris from the air cleaner assembly to make sure no dirt gets in the engine and to make sure you have a good seal.
- Install the new air filter element. Slide the open end of the air filter element in first, below the tab. Then push the closed end of the air filter into the bottom of the tray. The closed end should fit inside the groove in the tray. The tab of the closed end of the air filter should be oriented down and fit between the forks on the tray as shown at the arrow above.
Note:
Make sure you align the tab in the air filter element with the fork in the air cleaner assembly tray.
- Install the air cleaner assembly lid and tighten the four fasteners.