
This view of the Owner's Manual contains the very latest information, which may vary slightly from the printed Owner's Manual originally provided with your vehicle. It may also describe content that is not on or operates differently on your vehicle. Please consider the Owner's Manual originally provided with your vehicle as the primary source of information for your vehicle.

The information contained in this publication was correct at the time of release.In the interest of continuous development, we reserve the right to change specifications, design or equipment at any time without notice or obligation.No part of this publication may be reproduced, transmitted, stored in a retrieval system or translated into any language in any form by any means without our written permission.Errors and omissions excepted.
Copyright © 2024 Ford Motor Company
Rear Seats


Adjusting the Rear Seats
Second Row Seats
 WARNING:
Always drive and ride with your seatback upright and the lap belt snug and low across the hips.
WARNING:
Reclining the seatback can cause an occupant to slide under the seat's seatbelt, resulting in severe personal injuries in the event of a crash.
WARNING:
Always drive and ride with your seatback upright and the lap belt snug and low across the hips.
WARNING:
Reclining the seatback can cause an occupant to slide under the seat's seatbelt, resulting in severe personal injuries in the event of a crash. |
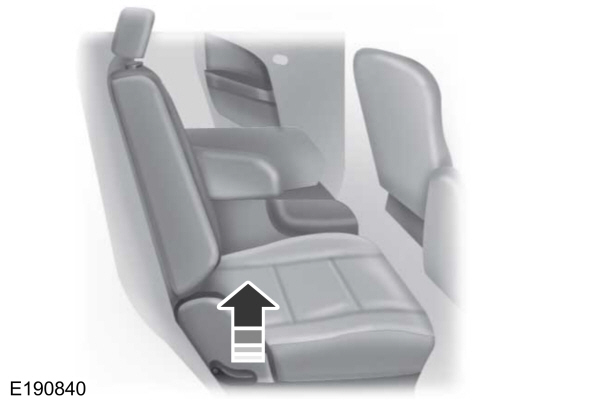
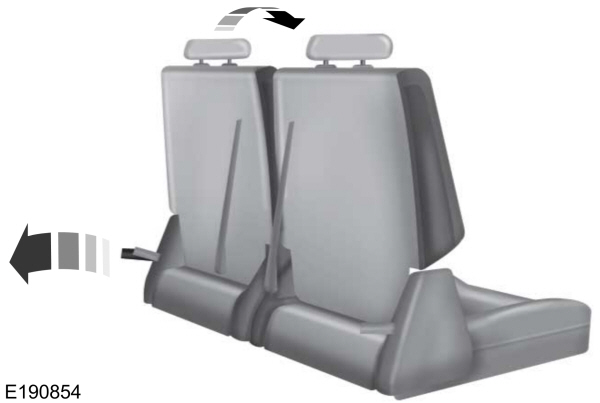
Recline Adjustment
Lift the handle to adjust the seatback rearward or forward. The seatback can also fold forward until it is flat.
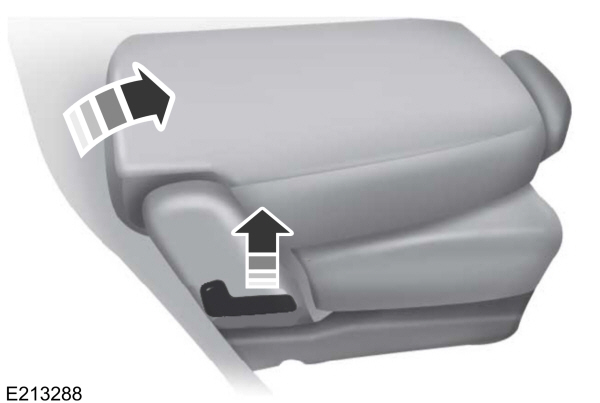
Fold flat seatback
Lift the handle and fold the seatback forward until it is flat.
Note:
For the bench seats, make sure the center seatbelt is unbuckled before folding the seatback.
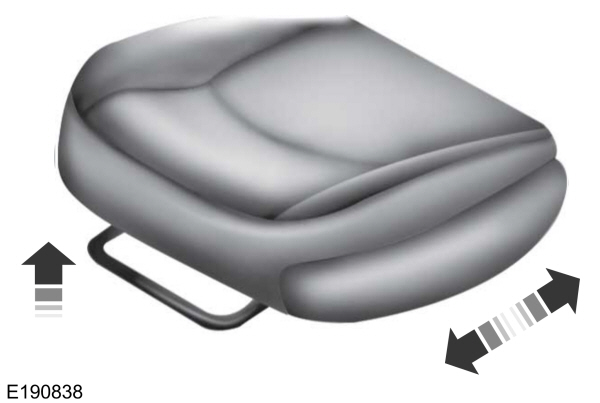
Moving the Seats Backward and Forward (If Equipped)
Third Row Seats (Manual Seats)
|
WARNING:
Do not place cargo or any objects behind the seat backrest before returning it to the original position. Pull on the seat backrest to make sure that it has fully latched after returning the seat backrest to its original position. An unlatched seat may become dangerous if you stop suddenly or have a crash.
WARNING:
Do not adjust a seat or release a seat floor latch when the vehicle is moving. Failure to follow this instruction could result in personal injury or death in a sudden stop or crash. |
Note:
Remove items from the second-row seat. Make sure that no bulky objects such as purses or briefcases are on the floor in front of the second-row seats before tumbling them.
Note:
For second-row bench seats, make sure the center seatbelt is unbuckled before folding the seatback.
Note:
You may have to move the front-row seat forward to allow the second-row seat to be fully tumbled.
Note:
You may have to lower the center head restraint. See
Head Restraints.
Fold and tumble the second-row seat to access the third row:
- Fold the outboard head restraint.
- Lift the handle on the side of the seat to fold the seatback flat.
- Lift the handle all the way up until the seat releases from the floor. Rotate the seat forward to allow access to the third row.
- To return the seatback to the floor from the tumbled position, rotate the seat down until you hear it latching to the floor.
- Lift the seatback toward the rear of the vehicle, and rotate the seatback until you hear a click, locking it in the upright position. Note: The seatback will not raise if the rear latch hooks are not properly engaged to the floor striker. If the seatback does not raise, then repeat Step 4.
- Pull the head restraint back up to its normal adjusted position.
Make sure that the rear latch hooks are properly engaged with the floor striker.
Note:
Make sure that the seat and seatback are latched securely in position. Keep floor area free of objects that would prevent proper seat engagement.
Third Row Seat Access (Power Fold and Tumble Seat-If equipped)
|
WARNING:
Do not fold a seat if it is occupied. Failure to follow this instruction could result in personal injury. |
The control is at the back of the rear door opening. Press and hold it to fold the seatback down and tumble the seat forward for access to the third row.
Third Row Seat Exit (Manual Seat, Power Fold and Tumble Seat)
|
WARNING:
Do not place cargo or any objects behind the seatback before returning it to the original position.
WARNING:
Check under the seat cushion to make sure no cargo or objects are under the seat cushion before returning the seat cushion to its original position, and that the seat cushion locks into place. Failure to do so may prevent the seat from operating properly in the event of a crash, which could increase the risk of serious injury.
WARNING:
Do not adjust a seat or release a seat floor latch when the vehicle is moving. Failure to follow this instruction could result in personal injury or death in a sudden stop or crash.
WARNING:
Do not drive your vehicle with a seat that is unlatched or in the folded position. Failure to follow this instruction could result in personal injury or death in the event of a sudden stop or crash. |
Note:
You may have to lower the center head restraint. See
Head Restraints.
- Fold the outboard head restraint.
- Pull on the strap on the back of the second row seat. This folds the seatback forward. Pull the strap a second time to tumble the seat forward, allowing easy exit from the third row seat.
- To return the seatback to the floor from the tumbled position, rotate the seat down until you hear it latching to the floor.
- Lift the seatback toward the rear of the vehicle, and rotate the seatback until you hear a click, locking it in the upright position. Note: The seatback will not raise if the rear latch hooks are not properly engaged to the floor striker. If the seatback does not raise, then repeat Step 3.
- Pull the head restraint back up to its normal adjusted position.
Make sure that the rear latch hooks are properly engaged with the floor striker.
Note:
Make sure that the seat and seatback are latched securely in position. Keep floor area free of objects that would prevent proper seat engagement.
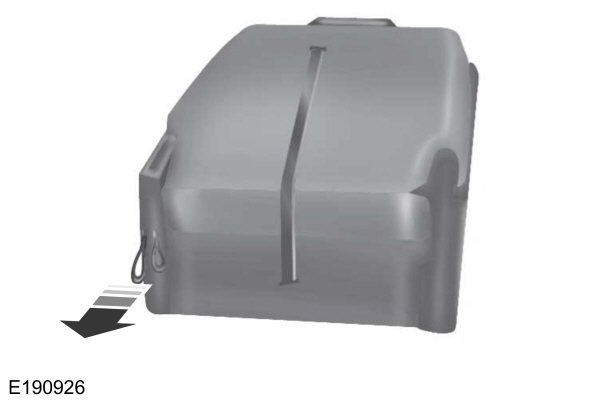
Folding the Third Row Manual Seat
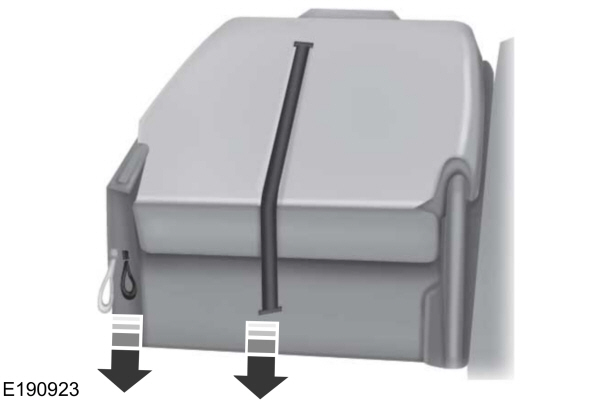
- Remove all objects from the seat and stowage tub.
- Fold the outboard head restraint by pulling the head restraint release strap.
- From the rear of the vehicle, fold the seatback by pulling and holding the red strap while pushing the seatback forward. Release the strap once the seatback starts rotating forward.
- Release the cushion latches by pulling the short black strap while pulling on the strap at the top of the seatback. This tumbles the seat all the way into the tub in the floor.
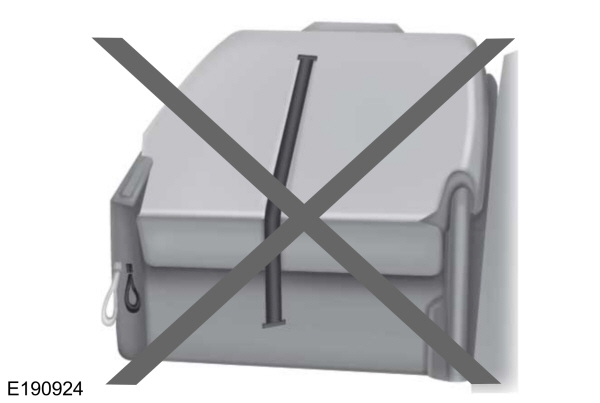
Note:
Do not use the seat anchors as cargo tie downs.
Note:
Do not use the third row seat back as a load floor when the seatback is folded.
Note:
Make sure that the area under the seat is free of objects before stowing it.
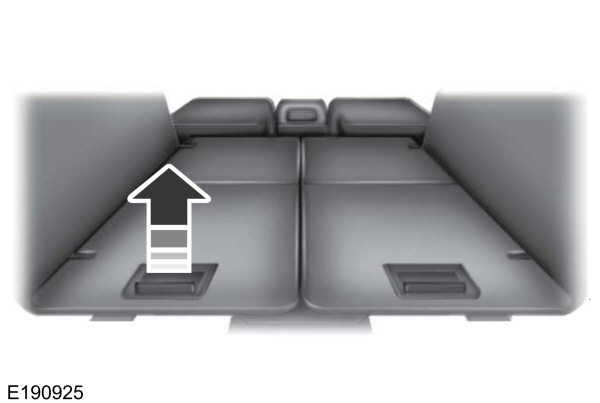
Unfolding the Third Row Manual Seat
|
WARNING:
Do not place cargo or any objects behind the seat backrest before returning it to the original position. Pull on the seat backrest to make sure that it has fully latched after returning the seat backrest to its original position. An unlatched seat may become dangerous if you stop suddenly or have a crash.
WARNING:
Do not sit in seats that are rearward facing when your vehicle is moving. This is not a correct seating position and the seatbelts do not properly function this way. Failure to follow this instruction could result in personal injury or death in a sudden stop or crash. |
Note:
Make sure that there are no objects such as books, purses or briefcases on the load floor before unstowing the seat. Failure to remove all objects from the top of the load floor prior to unstowing it may cause damage to the seat.
Note:
Make sure the area under the load floor is free of objects before unstowing it.
- Unlatch and lift the seat out of the tub in the floor by squeezing and pulling up on the handle. Once the seat is in a vertical position, push the seat over, letting it fall onto the latches.
- To return the seatback to the upright position, pull the red strap. Then while holding the red strap, pull the long strap on the seatback to raise the seatback.
- Pull the head restraints up to their normal positions.
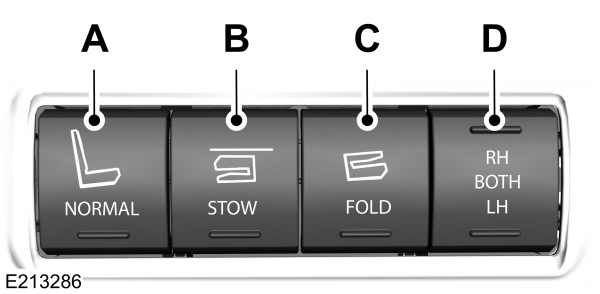
PowerFold™Third Row Seats (If Equipped)
The third row power seat buttons are behind the third row seats on the left-hand quarter trim panel.
| A B C D |
Note:
The third row seat includes obstacle detection that allows the seat to stop and reverse direction if it hits an obstacle so that the obstacle can be removed.
Note:
Pressing a different button while the power seat feature is already being performed may cause the first selected seat movement to be cancelled. Allow the first seat movement to be completed before pressing a button for another function.
Note:
Make sure that there are no objects such as books, purses or briefcases on the load floor before unstowing the seat. Failure to remove all objects from the top of the load floor prior to unstowing it may cause damage to the seat.
Note:
In order to allow the seat to complete the stowed position, do not place objects under the seat before stowing. Remove all objects from the seat and stowage tub.
Note:
In the unlikely event that the third row power seat stops prematurely or travels to an unexpected position, press the FOLD button (C) to reset the seat and return it to a normal position.
These seats feature a power one-touch operation that allows you fold and stow the seats.
- The power fold seats work only when the transmission is in park (P) and the liftgate is open.
- If the ignition is off and the feature is still running, the battery saver turns it off after 10 minutes. Press unlock on the remote entry key transmitter to reactivate the power seats or unlock it with the keyless entry keypad. See Remote Control.
Thank You For Your Feedback