
This view of the Owner's Manual contains the very latest information, which may vary slightly from the printed Owner's Manual originally provided with your vehicle. It may also describe content that is not on or operates differently on your vehicle. Please consider the Owner's Manual originally provided with your vehicle as the primary source of information for your vehicle.

The information contained in this publication was correct at the time of release.In the interest of continuous development, we reserve the right to change specifications, design or equipment at any time without notice or obligation.No part of this publication may be reproduced, transmitted, stored in a retrieval system or translated into any language in any form by any means without our written permission.Errors and omissions excepted.
Copyright © 2024 Ford Motor Company
Changing a Bulb


 WARNING:
Switch the lamps and the ignition off. Failure to do so could result in serious personal injury.
WARNING:
Lamps and associated components become hot when in use. Let them cool down before you remove them.
WARNING:
Switch the lamps and the ignition off. Failure to do so could result in serious personal injury.
WARNING:
Lamps and associated components become hot when in use. Let them cool down before you remove them. |
Use the correct specification bulb. See
Bulb Specification Chart.
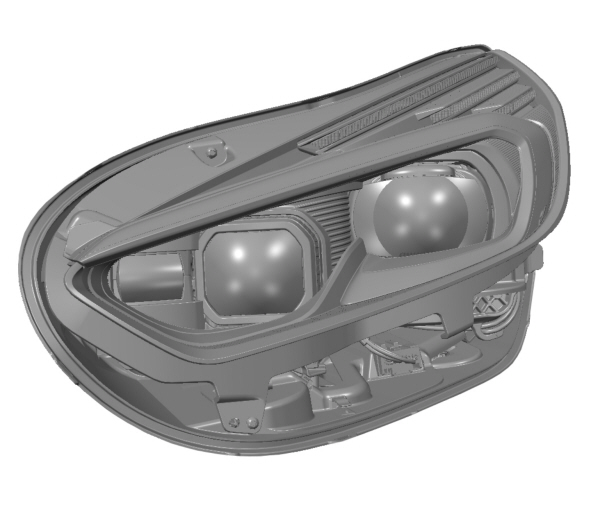
Headlamp
You may have to remove the headlamp assembly prior to replacing a bulb. See
Removing a Headlamp.
Halogen Headlamp
| A B C D |
| A B C D |
Headlamp High Beam and Daytime Running Lamp
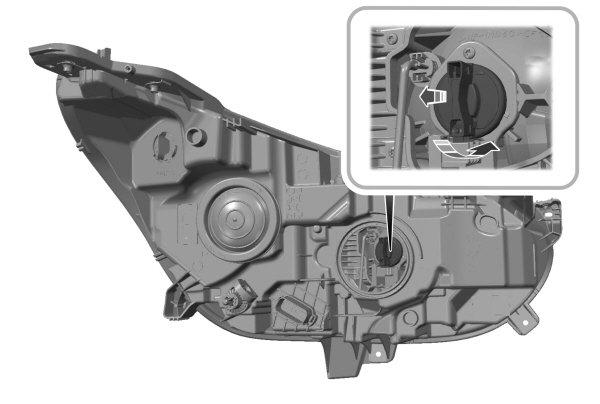
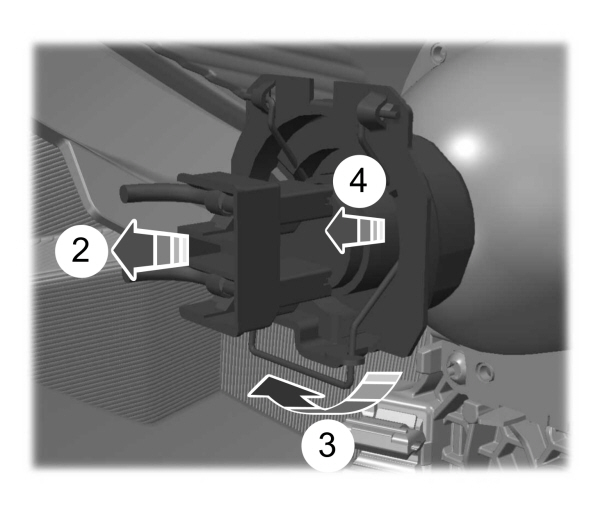
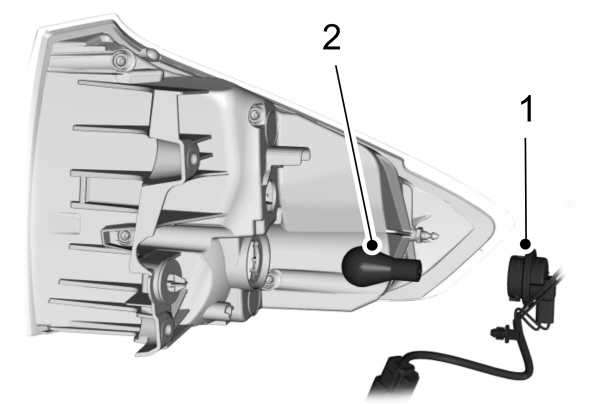
- Carefully remove the cover.
- Disconnect the electrical connector.
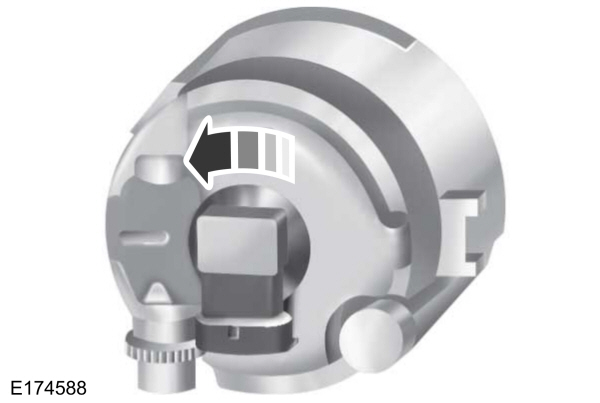
- Turn the bulb holder counterclockwise and remove it.
Note:
You cannot separate the bulb from the bulb holder.
Note:
Do not touch the bulb glass.
Front Position Lamp
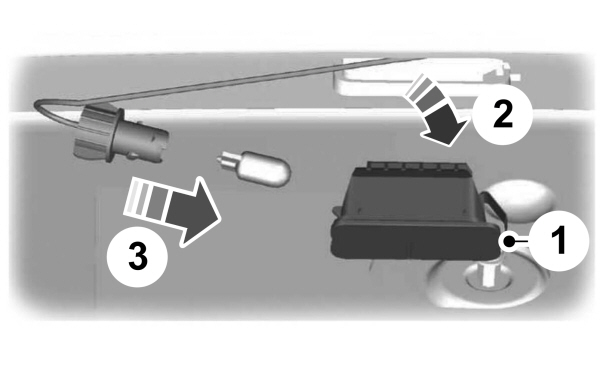
- Carefully remove the cover.
- Depress the tabs on the socket and remove the socket and bulb together.
- Remove the bulb by pulling it straight out.
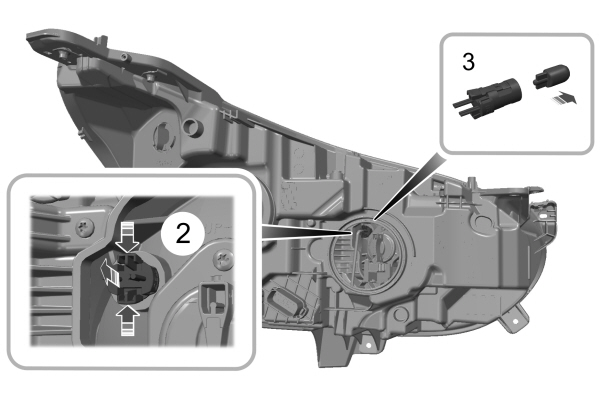
Headlamp Low Beam
- Carefully remove the cover.
- Disconnect the electrical connector.
- Release the clip.
- Remove the bulb.
Note:
Do not touch the bulb glass.
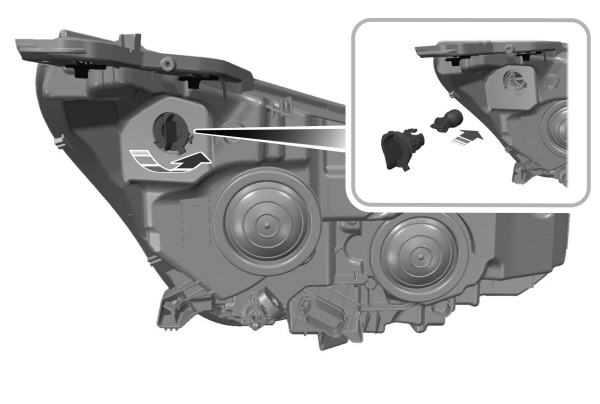
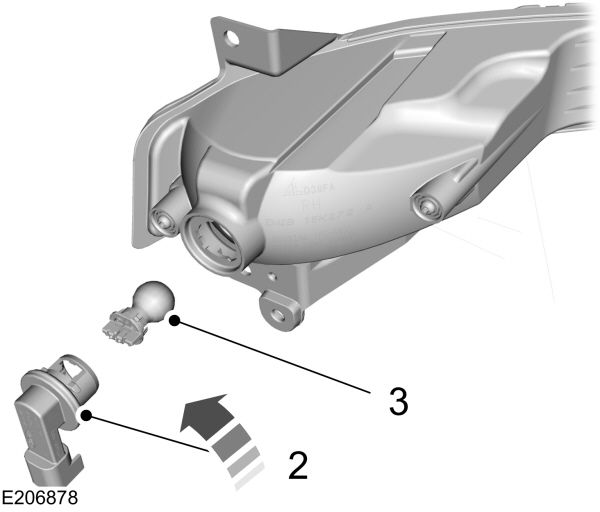
Front Direction Indicator
- Turn the bulb holder counterclockwise and remove it.
- Remove the bulb by pulling it straight out.
LED Headlamp
These lamps have LEDs.
Note:
We recommend that you have LEDs changed by an authorized dealer.
Front Fog Lamp
Access the underside of your vehicle in front of the front wheel.
- Disconnect the electrical connector.
- Turn the bulb holder counterclockwise and remove it.
Note:
You cannot separate the bulb from the bulb holder.
Note:
Do not touch the bulb glass.
Note:
Front fog lamps are also available as LED lamps.
Note:
We recommend that you have LEDs changed by an authorized dealer.
Side Direction Indicator
These lamps have LEDs.
Note:
We recommend that you have LEDs changed by an authorized dealer.
Rear Lamp
Remove the rear lamp assembly prior to replacing any bulb.See
Removing a Rear Lamp
.
Rear Lamp
These lamps have LEDs.
Note:
We recommend that you have LEDs changed by an authorized dealer.
Stoplamp
These lamps have LEDs.
Note:
We recommend that you have LEDs changed by an authorized dealer.
Rear Direction Indicator
- Turn the bulb holder counterclockwise and remove it.
- Press the bulb in and turn the bulb counterclockwise to remove it.
Note:
Rear direction indicators are also available as LED lamps.
Note:
We recommend that you have LEDs changed by an authorized dealer.
Reversing Lamp
- Turn the bulb holder counterclockwise and remove it.
- Remove the bulb by pulling it straight out.
License Plate Lamp
- Use a suitable tool, for example a screwdriver, to carefully remove the lamp.
- Turn the bulb holder counterclockwise and remove it.
- Remove the bulb by pulling it straight out.
High Mounted Stoplamp
These lamps have LEDs.
Note:
We recommend that you have LEDs changed by an authorized dealer.
Rear Fog Lamp
Access the underside of your vehicle behind the rear wheel.
- Disconnect the electrical connector.
- Turn the bulb holder counterclockwise and remove it.
- Press the bulb in and turn the bulb counterclockwise to remove it.
- Please note that Ford will not respond to individual feedback.
- Please provide detailed feedback regarding any inaccuracies in the content or any missing content in the Owner's Manual.
- Your feedback will be investigated and any necessary changes will be updated in the online Owner's Manual.
Your input is valuable in helping us improve our Owner's Manual. Thank you for taking the time to provide your feedback.