
This view of the Owner's Manual contains the very latest information, which may vary slightly from the printed Owner's Manual originally provided with your vehicle. It may also describe content that is not on or operates differently on your vehicle. Please consider the Owner's Manual originally provided with your vehicle as the primary source of information for your vehicle.

The information contained in this publication was correct at the time of release.In the interest of continuous development, we reserve the right to change specifications, design or equipment at any time without notice or obligation.No part of this publication may be reproduced, transmitted, stored in a retrieval system or translated into any language in any form by any means without our written permission.Errors and omissions excepted.
Copyright © 2024 Ford Motor Company
Rear Seats


 WARNING:
Do not use the bench seats as a bed when your vehicle is moving. Failure to follow this warning could result in serious personal injury or death.
WARNING:
Make sure that the seats and the seat backrests are secure and fully locked in their catches.
WARNING:
Do not place any objects on a folded seat. Hard objects may become projectiles in a crash or sudden stop, which may increase the risk of serious personal injury.
WARNING:
Do not sit in a seat facing a folded seat. Failure to follow this instruction could result in personal injury in the event of a sudden stop or crash.
WARNING:
Do not use the bench seats as a bed when your vehicle is moving. Failure to follow this warning could result in serious personal injury or death.
WARNING:
Make sure that the seats and the seat backrests are secure and fully locked in their catches.
WARNING:
Do not place any objects on a folded seat. Hard objects may become projectiles in a crash or sudden stop, which may increase the risk of serious personal injury.
WARNING:
Do not sit in a seat facing a folded seat. Failure to follow this instruction could result in personal injury in the event of a sudden stop or crash. |
Recline Adjustment
With the seat occupied, lift the recline lever or pull the strap to recline the seat backrest.
Folding the Seat Backrest
|
WARNING:
When folding the seat backrest down, take care not to get your fingers caught in the mechanism. |
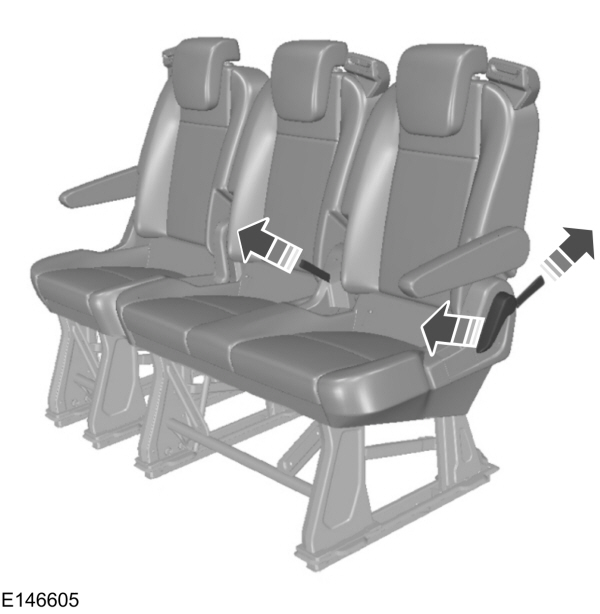
Easy Entry
Accessing the Third Row Seats
|
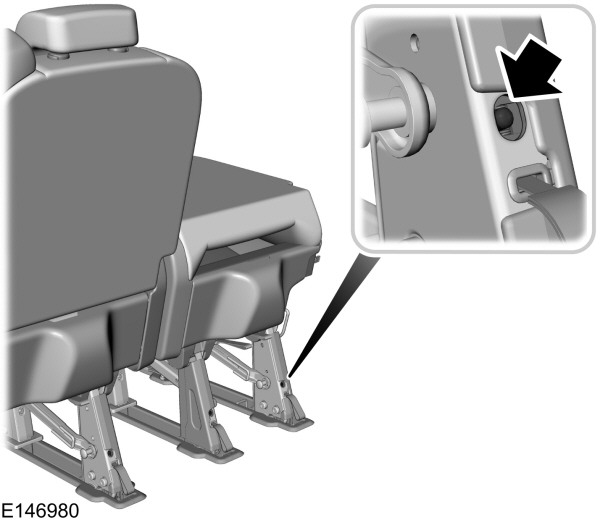
WARNING:
Make sure the latch indicators are not protruding after you lock the seat legs into the floor catches.
WARNING:
Make sure that you securely fasten the seat catches when installing. Make sure that the latches are correctly engaged by checking the red latch indicators. |
- Fold the seat backrest forward by pulling the upper lever, or pull the red strap on the seat backrest to release the seat backrest.
- Move the seat backrest into the down position until the recliner engages.
- Pull the lower lever up.
- Lift and tilt the entire seat forward.
To bring the seat backrest to the seating position, reverse the order of the preceding steps.
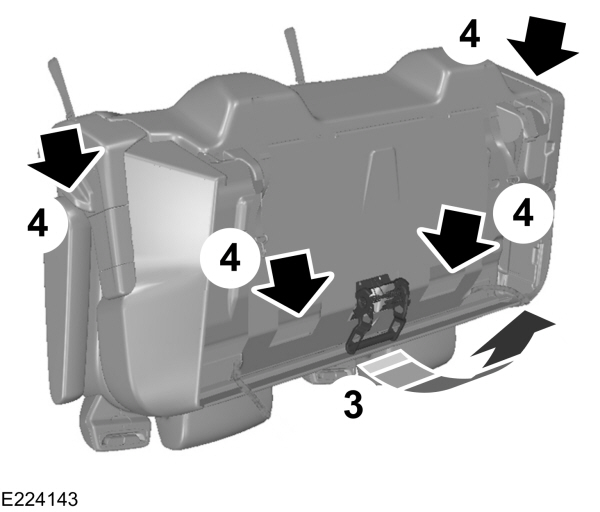
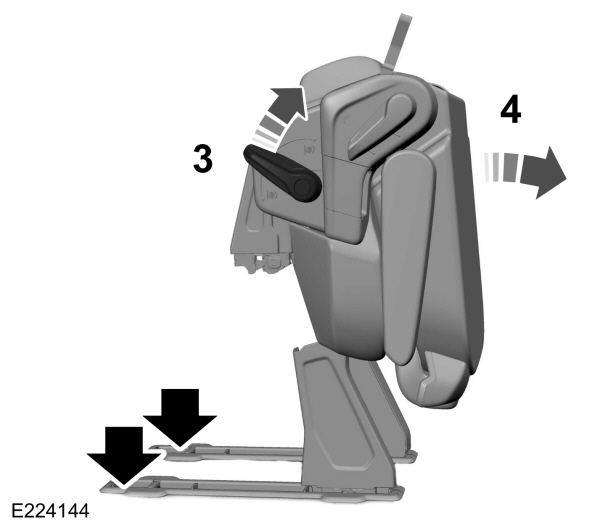
Removing the Seats
|
WARNING:
Seats can weigh up to
60 kg. Do not attempt to lift or carry any seat on your own.
WARNING:
When folding the seat backrest down, take care not to get your fingers caught in the mechanism. |
- Fold all seat backrests forward. See Accessing the Third Row Seats.
- Tilt the seat forward. For single seats, pull the lower lever up and tilt the seat forward. For dual seats, from the third row, pull both release straps and tilt the seat up with the straps.
- Pull the now accessible release handle to unlock the floor latches and tilt the seat gently forward.
- Lift and remove the seat. For single seats, grab the seat on the side valance. For dual seats, grab the two sections next to the release handle.
Note:
The third row can be stored directly behind the second row to create loading space.
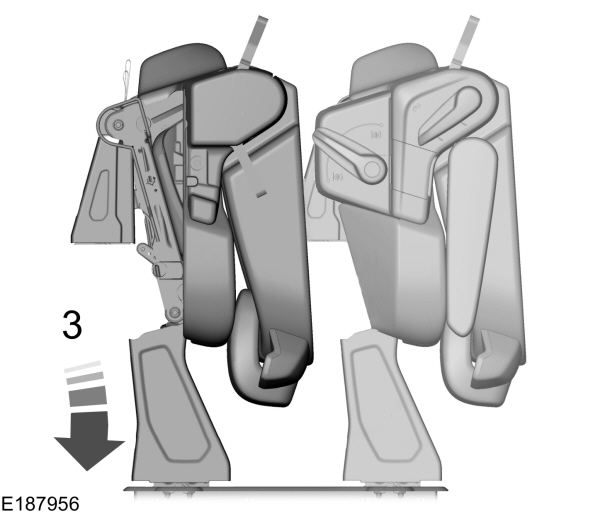
Installing the Seats
|
WARNING:
Make sure that you securely fasten the seat catches when installing. Make sure that the latches are correctly engaged by checking the red latch indicators. |
- The floor latches are designed to catch when the seats are gently dropped into the floor rail.
Note:
If the seat latches do not catch, remove the seat by pulling the release handle again and repeat the process. See Removing the Seats.
- For dual seats and the single third row seat, pull both upper straps and tilt the seat down into the seating position. For the second row single seat, pull the large lever rearward and tilt the seat down.
- The seats have latch indicators at the bottom of each leg. Check the latch indicators after installing the seats.
- Make sure that the red latch indicators on the bottom of the seat legs are not visible above floor level.
- Release the seat backrest by pulling the red straps or the side upper lever and move the seat backrest up into the seating position until the recliner engages.
Seat Storage
- Please handle all seats with care.
- Please store the seats in a dry and warm environment
- Make sure the seats are securely fixed and cannot fall over.
- Pay special attention to the latches integrated in the seat feet. Store the seat on solid ground to prevent possible soiling to the latch mechanism.
Double Cab
The under seat storage guard may be set to two different positions. Lift up the guard and pull out to remove.
- Please note that Ford will not respond to individual feedback.
- Please provide detailed feedback regarding any inaccuracies in the content or any missing content in the Owner's Manual.
- Your feedback will be investigated, and any necessary changes will be updated in the online Owner's Manual.
Your input is valuable in helping us improve our Owner's Manual. Thank you for taking the time to provide your feedback.