
This view of the Owner's Manual contains the very latest information, which may vary slightly from the printed Owner's Manual originally provided with your vehicle. It may also describe content that is not on or operates differently on your vehicle. Please consider the Owner's Manual originally provided with your vehicle as the primary source of information for your vehicle.

The information contained in this publication was correct at the time of release.In the interest of continuous development, we reserve the right to change specifications, design or equipment at any time without notice or obligation.No part of this publication may be reproduced, transmitted, stored in a retrieval system or translated into any language in any form by any means without our written permission.Errors and omissions excepted.
Copyright © 2024 Ford Motor Company
Jump Starting the Vehicle - 2.0L EcoBlue

 WARNING:
Connect batteries with only the same nominal voltage.
WARNING:
Use only adequately sized cables with insulated clamps.
WARNING:
Connect batteries with only the same nominal voltage.
WARNING:
Use only adequately sized cables with insulated clamps. |
Note:
Do not disconnect the battery of the disabled vehicle as this could damage the vehicle electrical system.
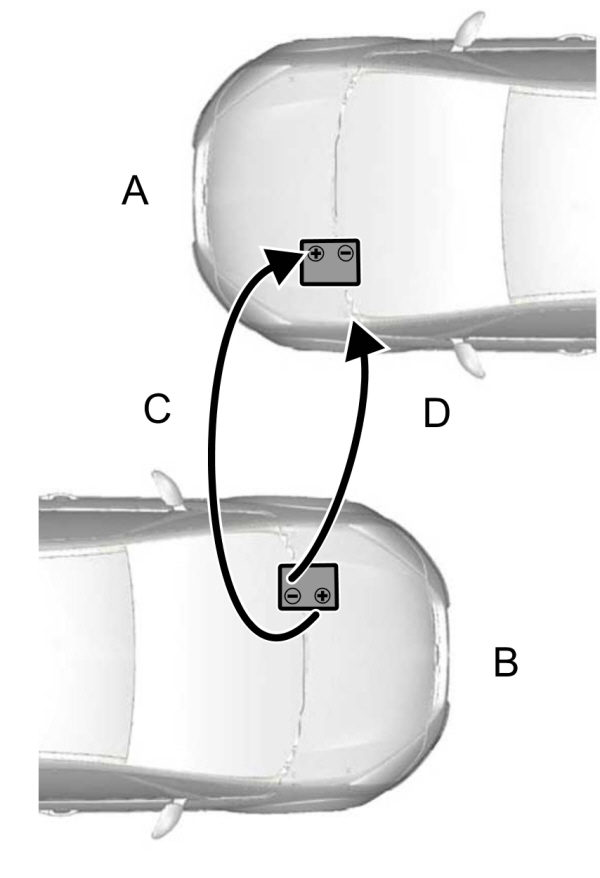
Connecting the Jumper Cables
| A B C D |
- Switch the ignition off and any electrical equipment.
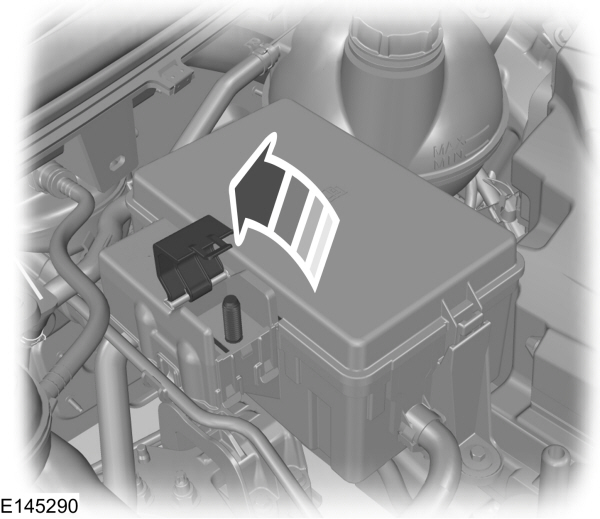
- Lift up the battery positive connection point cover. For item location, refer to the appropriate under hood overview. See Maintenance.
|
WARNING:
Make sure that the cables are clear of any moving parts and fuel delivery system parts. |
- Connect one end of the positive jumper cable to the positive terminal of the discharged battery and the other end to the positive terminal of the booster battery.
|
WARNING:
Do not connect the negative jumper cable to any other part of your vehicle. Use the ground point. |
- Connect one end of the negative jumper cable to the negative terminal of the booster battery or to a suitable ground point and the other end to the ground point on your vehicle.
Starting the Engine
- Start the engine of the vehicle with the booster battery and keep the engine speed between 2000 and 3000 RPM.
- Start the engine of the vehicle with the discharged battery.
- When the engine starts, run the engines for three minutes before you disconnect the jumper cables.
Remove the jumper cables in the reverse order that they were connected.
Note:
Do not switch the headlamps on before you disconnect the jumper cables. The peak voltage could cause the bulbs to fail.
- Please note that Ford will not respond to individual feedback.
- Please provide detailed feedback regarding any inaccuracies in the content or any missing content in the Owner's Manual.
- Your feedback will be investigated, and any necessary changes will be updated in the online Owner's Manual.
Your input is valuable in helping us improve our Owner's Manual. Thank you for taking the time to provide your feedback.