This view of the Owner's Manual contains the very latest information, which may vary slightly from the printed Owner's Manual originally provided with your vehicle. It may also describe content that is not on or operates differently on your vehicle. Please consider the Owner's Manual originally provided with your vehicle as the primary source of information for your vehicle.
The information contained in this publication was correct at the time of release.In the interest of continuous development, we reserve the right to change specifications, design or equipment at any time without notice or obligation.No part of this publication may be reproduced, transmitted, stored in a retrieval system or translated into any language in any form by any means without our written permission.Errors and omissions excepted.
Copyright © 2024 Ford Motor Company
Changing a Bulb
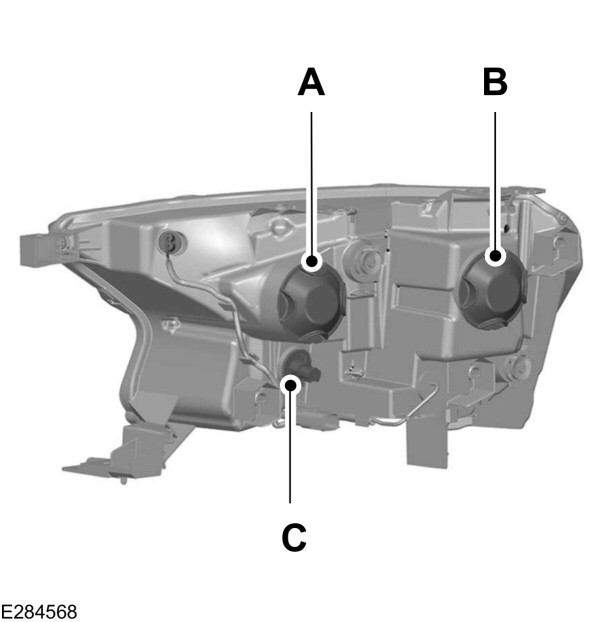 Headlamp assembly:
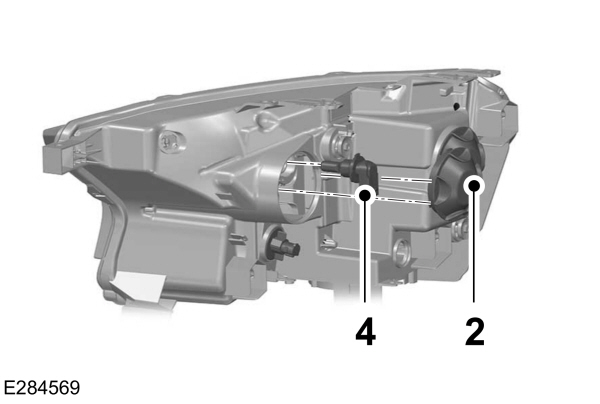



Replacing the Headlamp Bulbs
Note:
Do not touch the bulb glass.
 Headlamp assembly:
- High beam bulb.
- Low beam bulb.
- Front park and direction indicator bulb.
Replacing the High Beam Headlamp Bulb

- Make sure the lamps are off.
- With the hood open, locate and carefully remove the cover.
- Disconnect the electrical connector.
- Turn the bulb counterclockwise and remove it.
- Install the new bulb in reverse order.
Replacing the Low Beam Headlamp Bulb

- Make sure the lamps are off.
- With the hood open, locate and carefully remove the cover.
- Disconnect the electrical connector.
- Turn the bulb counterclockwise and remove it.
- Install the new bulb in reverse order.
Replacing the Front Park and Direction Indicator Bulb
- Make sure the lamps are off.
- Turn the bulb holder counterclockwise and remove it.
- Remove the bulb by pulling it straight out.
- Install the new bulb in reverse order.
Replacing LED Headlamp Bulbs
All bulbs in this assembly except for the direction indicator bulb are LED. If an LED fails have your vehicle checked as soon as possible. Contact an authorized dealer.
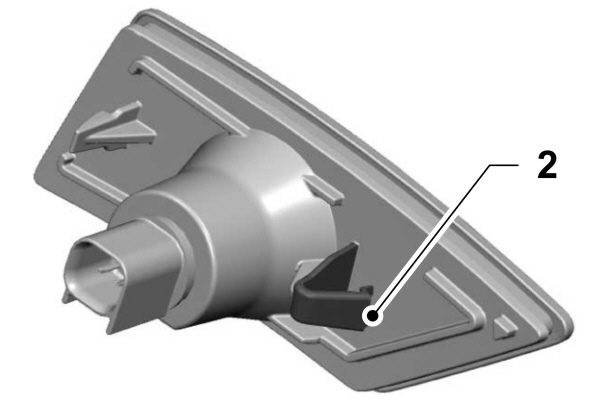
Front Side Marker Bulb

- Make sure the lamps are off.
- Remove the lamp from the wheel lip molding by releasing the clip.
- Turn the bulb holder counterclockwise and remove it.
- Remove the bulb by pulling it straight out.
- Install the new bulb in reverse order.
Approach Lamp and Side Direction Indicator (If Equipped)

| A B |
If an LED fails have your vehicle checked as soon as possible. Contact an authorized dealer.
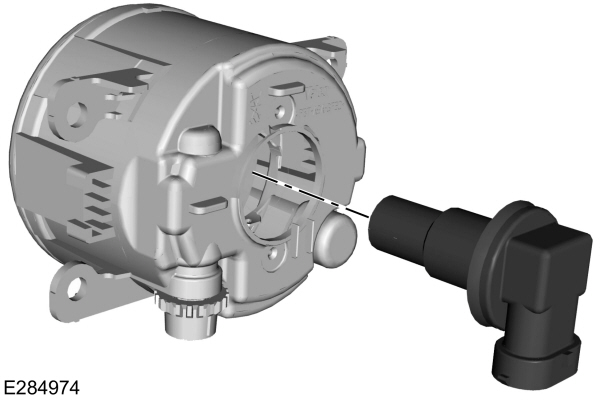
Front Fog Lamps

- Make sure the lamps are off.
- To access the bulb, reach behind the bumper.
- Disconnect the electrical connector.
- Turn the bulb counterclockwise and remove it.
- Install the new bulb in reverse order.
Note:
You cannot separate the bulb from the bulb holder.
Replacing LED Fog Lamp Bulbs (If Equipped)
If an LED fails have your vehicle checked as soon as possible. Contact an authorized dealer.
Rear Lamps
Type 1
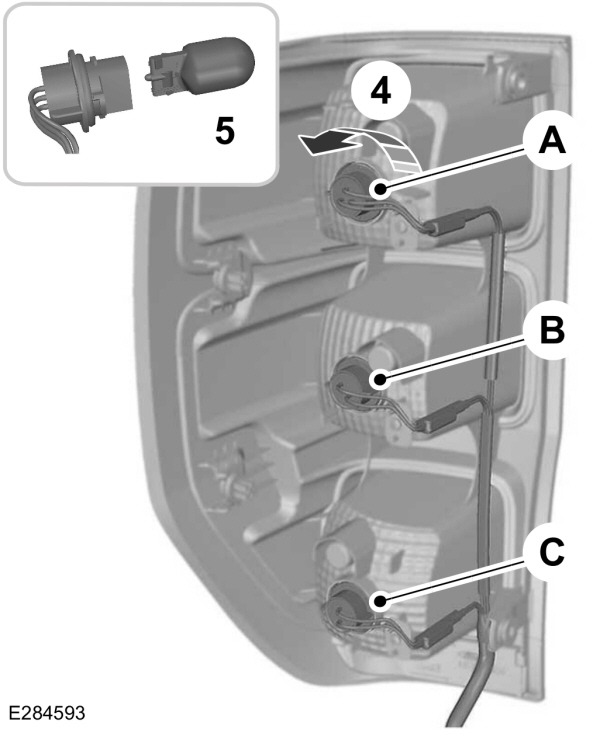
Tail, Brake, Reversing, and Direction Indicator


| A B C |
- Make sure the lamps are off.
- Open the tailgate to access the rear lamp assemblies.
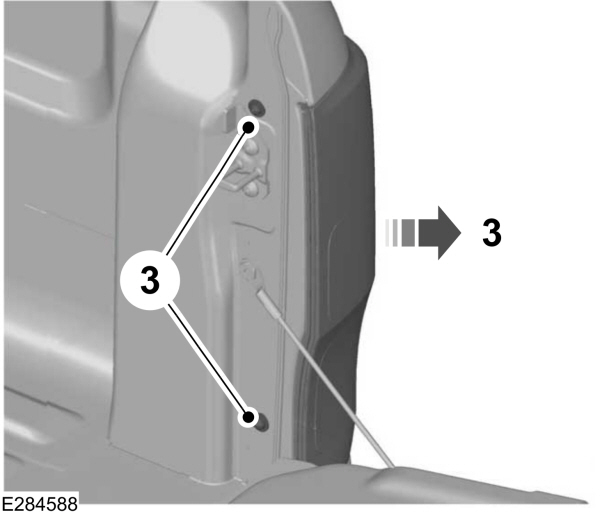
- Remove the two bolts from the tail lamp assembly. Then, carefully pull the lamp assembly from the tailgate pillar by releasing the two retaining tabs.
- Turn the bulb holder counterclockwise and remove it.
- Remove the bulb by pulling it straight out.
- Install the new bulb in reverse order.
Replacing LED Brake, Rear, Direction Indicator and Reverse Lamp Bulbs
If an LED fails have your vehicle checked as soon as possible. Contact an authorized dealer.
Type 2
Tail, Brake, Reversing Lamp and Direction Indicator

- Make sure the lamps are off.
- Undo the screws to remove the outer lens and access the bulbs.
- Remove the bulb by pulling it straight out.
- Install the new bulb in reverse order.
License Plate Lamp

- Make sure the lamps are off.
- Use a screwdriver to carefully remove the lamp from the rear bumper.
- Turn the bulb holder counterclockwise and remove it.
- Remove the bulb by pulling it straight out.
- Install the new bulb in reverse order.
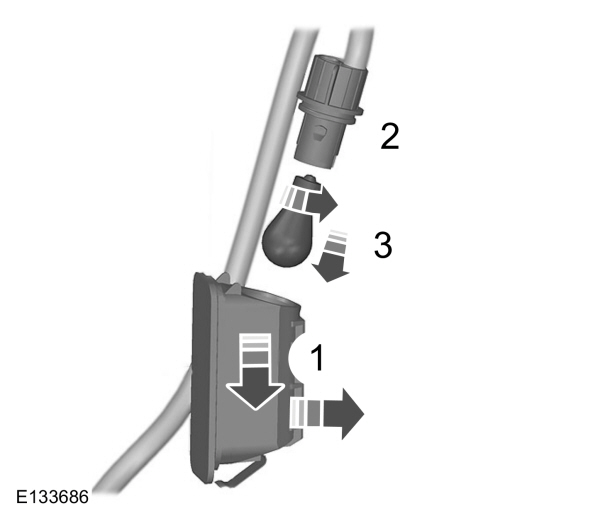
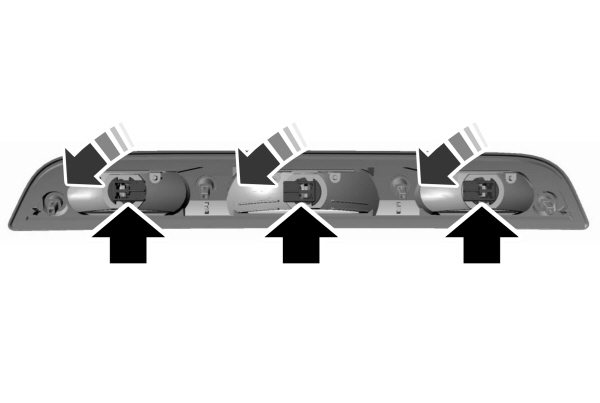
Central High Mounted Brake Lamp

- Make sure the lamps are off.
- Remove the four screws and move the lamp assembly away from the vehicle to expose the bulb sockets.
- Remove the bulb socket by rotating it counterclockwise and pulling it out of the lamp assembly.
- Pull the bulb straight out of the socket.
- Install the new bulb in reverse order.
Replacing LED Cargo Lamp and High-mount Brake Lamp Bulbs
If an LED fails have your vehicle checked as soon as possible. Contact an authorized dealer.
Thank You For Your Feedback
