
This view of the Owner's Manual contains the very latest information, which may vary slightly from the printed Owner's Manual originally provided with your vehicle. It may also describe content that is not on or operates differently on your vehicle. Please consider the Owner's Manual originally provided with your vehicle as the primary source of information for your vehicle.

The information contained in this publication was correct at the time of release.In the interest of continuous development, we reserve the right to change specifications, design or equipment at any time without notice or obligation.No part of this publication may be reproduced, transmitted, stored in a retrieval system or translated into any language in any form by any means without our written permission.Errors and omissions excepted.
Copyright © 2026 Ford Motor Company
Electric Vehicle Information (If Equipped)
 The Charge Settings information for your plug-in hybrid vehicle is available through the Home screen or under Vehicle Settings. To Improve your charging experience, your vehicle has the following convenience features.
Power Flow
 The Power Flow information for your plug-in hybrid vehicle is available through the Home screen or under Apps. |
Vehicle Operational States
Power will flow to or from the front and rear wheels depending on operational state and drive conditions.
- Idling: The vehicle is running and in park (P). The engine and, or the high voltage battery are on.
- Electric Driving: The vehicle is running and in drive (D) or neutral (N). The high voltage battery provides power to the wheels.
- Hybrid Driving: The vehicle is running and in drive (D) or neutral (N). The engine and the high voltage battery provide power to the wheels.
- Engine Driving: The vehicle is running and in drive (D) or neutral (N). The engine provides power to the wheels.
- Regenerative Braking: The vehicle is running in drive gear (D) and is slowing down. The regenerative braking system captures power and sends it back to the high voltage battery.
- Charging: The vehicle is plugged in and the high voltage battery is being charged.
Engine On Due To
The following conditions help to explain why the engine is on, and what you can do to allow all electric operation.
- Drive Power: The engine is on due to accelerator pedal pressure or speed control activation. Reduce pressure on the accelerator pedal or switch off the speed control to return to full electric mode.
- High Speed: The engine is on because the vehicle speed exceeds the level for full electric operation. Reduce the speed to return to electric operation.
- Heater Setting: The engine is on because of the heater setting. Reduce or switch off the heater setting to return to electric operation.
- Neutral Gear: The engine is on because the vehicle is in neutral (N). Shift out of neutral gear to return to electric operation.
- Engine Cold: The engine is on because it is cold. The vehicle returns to electric operation once the engine is sufficiently warm.
- Battery Charging: The engine is on to charge the high-voltage battery. The vehicle returns to electric operation once the battery is sufficiently charged.
- Low Gear: The engine is on because the vehicle is in low gear. Shift out of low gear to return to electric operation.
- Normal Operation: The engine is on to optimize vehicle operation. The vehicle returns to electric operation when possible.
- Low Use: The engine is on to maintain engine oil quality. The vehicle returns to electric operation when low engine use mode is complete. See Plug-In Hybrid Vehicle Operation.
- Fuel Maintenance: The engine is on to maintain fuel freshness. The vehicle returns to electric operation when fuel freshness mode is complete. See Fuel Quality.
- Engine Braking Active: The engine is on to provide increased powertrain braking. This can occur when you turn on the grade assist feature, when speed control is on or when driving with your foot off the accelerator pedal. Turning off grade assist or speed control may allow the vehicle to return to electric operation.
- Battery Temperature: The engine is on due to high or low high-voltage battery temperature. This is a normal operating condition. The vehicle returns to electric operation when possible.
- Drive Mode: The engine is on due to the drive mode selection. Select an appropriate drive mode for electric only operation.
Charge Settings
The Charge Settings information for your plug-in hybrid vehicle is available through the Home screen or under Vehicle Settings. To Improve your charging experience, your vehicle has the following convenience features.Charge Times
Once you set up Charge Times for a specific charging location, your vehicle prioritizes charging based on your preferred time settings. You can set two preferred charging time windows for weekdays and two for weekends. This feature allows you to take advantage of electric utility rate plans that offer lower pricing during certain times of day. Contact your utility company to see what plans are available.
Note:
You can also set up and use these features using the Lincoln Way app.
Departure Times
Setting Departure Times allows you to control charging schedules and have the vehicle cabin heated or cooled while plugged in, so your vehicle is ready to drive when you are. By setting a departure time your vehicle can use your charge time settings to minimize your electricity costs but still prioritize finishing charging before your scheduled departure. A calendar view allows you to program two departure times per day for each day of the week.
Note:
You can also set up and use these features using the Lincoln Way app.
Charge Settings Screen
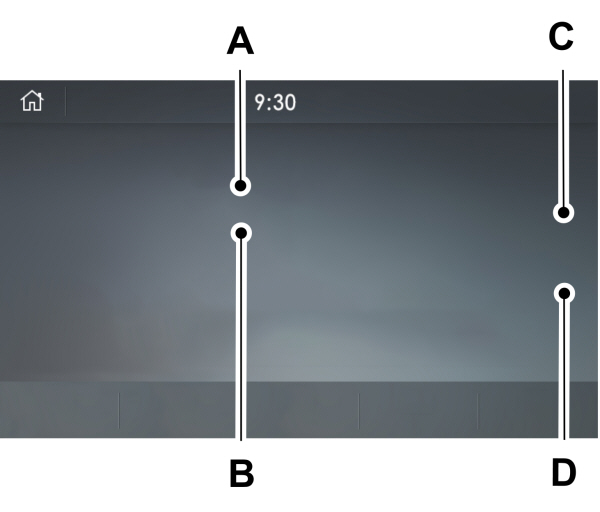
A Charging status. B Charging time information.C High voltage battery state of charge.D Plug and charging status. |
Charging Status
Displays the present state of the charging system. See
Charging the High Voltage Battery - Plug-In Hybrid Electric Vehicle (PHEV).
| Charging Status | Description and Action |
|---|---|
| Will charge when plugged in. | Your vehicle is unplugged and starts charging when plugged in. |
| Will wait for preferred charge time. | Your vehicle is unplugged at a saved location with Charge Times is enabled. Charging is scheduled to start at the time displayed based on your charge time settings. You must plug in prior to the start time shown for the vehicle to begin charging at that time. |
| Waiting for preferred charge time. | Your vehicle is plugged in at a saved location with Charge Times enabled. Charging starts at the time displayed, which is based on your Charge Times settings. |
| Charging. | Your vehicle is plugged in and using power to charge the high voltage battery or run electrical systems. |
| Charged. | Your vehicle is finished charging. |
| Vehicle charge fault. | Your vehicle is plugged in and there is a fault within the vehicle charging system. Unplug and plug back in. If the fault is still present, contact your dealer. |
| Charge station fault. | Your vehicle is plugged in and a fault is detected with the charge station or charging cord. Check the charging cord and the charge station or electrical supply. |
| Charge station not detected. | A charging coupler is plugged into the vehicle but there is no connection with a charging power source. |
| Incompatible charge station. | Your vehicle is plugged in but cannot communicate with the charging station. Contact the station provider. |
| Charge station paused. | Your vehicle is plugged in and charging is paused at the charge station. |
Charging Time Information
Displays estimates of how long your vehicle takes to fully charge when plugged into a high or low power charger.
- High power estimate: The minimum time to a 100% charge using a high power charger.
- Low power estimate: The longest time to a 100% charge using a low power charger.
When charging, the start and estimated end time displays. When your vehicle is not plugged in and at a location with Charge Times enabled, the start and end times display based on known charging power.
Note:
Charging durations and end times are only estimates. Certain conditions may result in longer charging times. See
Charging the High Voltage Battery - Plug-In Hybrid Electric Vehicle (PHEV).
High Voltage Battery State of Charge
Displays the remaining charge percentage with 100% representing the total amount of energy you can get from an external charge.
Plug and Charging Status
Displays the plug and charging status icons.
 Not plugged in. |  Plugged in and not currently charging. |
 Plugged in and charging. |  Plugged in and waiting to charge based on charge time settings. |
Charge Preferences
Touch the button to access Charge Time and Departure Time settings. Additional information and settings are displayed on the charge settings screen once Charge Time or Departure Times are set up.
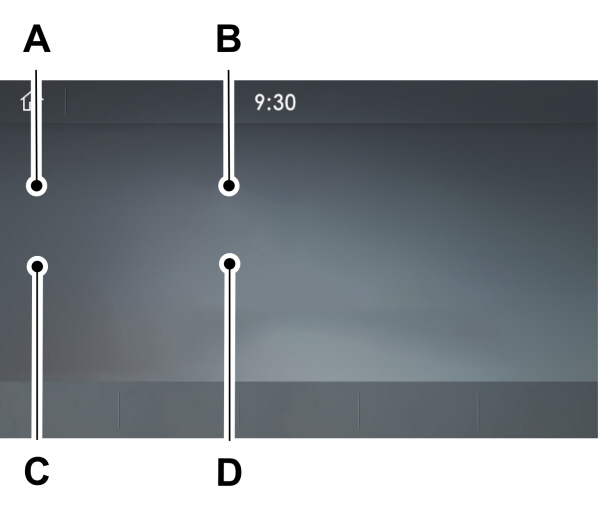
| ACharge Times on and off switch. B Charge time location name.C Departure Times on and off switch.D Next departure time and cabin temperature. |
Charge Times On and Off Switch
This switch is visible when your vehicle is at a saved Charge Times location. Use the switch to turn your charge time settings on and off for this location.
Charge Times Location Name
Displays when your vehicle is at a saved Charge Times location.
Departure Times On and Off Switch
This switch is visible when you have at least one departure time set. Use this switch to turn all departure times on and off. Switching departure times off does not delete your settings.
Next Departure Times and Cabin Temperature
Displays the next departure time and associated cabin temperature setting.
Charge Time Settings
Follow these steps to set a preferred charge time for a charging location.
- Select Charge Preferences on the Charge Settings screen.
- Select Charge Time Setup on the Edit Charge Preferences screen.
- Select Add New Location on the Charge Times screen. You can also edit settings for previously saved locations from this screen.
- Select an address from the Recent Charge Locations screen.
- Set Location Name as desired and then select Continue to Schedule on the Confirm Location for Charge Times screen.
- Select WEEKDAY or WEEKEND on the Preferred Charge Times screen.
- On the Select preferred WEEKDAY or WEEKEND Charge Times screen, use the circular 24 hour clock to select your charging time windows. You can select up to two time windows by pressing and dragging across the hour buttons. When you have selected your preferred times then press Next to return to the Preferred Charge Times screen. Repeat for WEEKEND or WEEKDAY as desired. Once you are done setting preferred charge times, press Save.
Note:
Selecting all or none of the 24 hours results in any time of day given equal priority for charging.
- Your saved location now shows on the Charge Times screen. Select Done to return to the main charge settings screen. Whenever your vehicle is at a saved charging location, the charge settings screen displays the location name, and the charging times are based on your Charge Time settings for that location plus the next Departure Time.
Note:
A 100% charge by your next Departure Time is always the priority. When Charge Times are set, charging outside your preferred charging time windows could be necessary in order to finish by your next Departure Time. A notification appears when this condition occurs.
Note:
When a 100% charge cannot be done by your next departure time, a notification appears which includes an estimate of the charge level you will have at your departure time.
Departure Time Settings
- Select Charge Preferences on the Charge Settings screen.
- Select Departure Time Setup on the Edit Charge Preferences screen.
- Two time settings show for each day of the week on the Departure Times schedule screen. Select any one.
- On the Departure Time settings screen, set your desired departure time, cabin temperature and days of the week to repeat. Press Save.
- Your settings are now shown on the Departure Times schedule screen. Press Back two times to return to the main charge settings screen. The next departure time and cabin temperature setting display.
Note:
Cabin conditioning can perform differently depending on if you plug in with the included convenience cord or a higher power charging station. The power available for conditioning is limited to the charging station power available.
Note:
Your vehicle may not always reach the set cabin temperature due to charging and ambient temperature conditions. This is normal operation
- Please note that Ford will not respond to individual feedback.
- Please only provide detailed feedback regarding any inaccuracies in the content or any missing content in the Owner's Manual.
- Your feedback will be investigated, and any necessary changes will be updated in the online Owner's Manual.
- Please do not submit any vehicle related feedback. To submit feedback related to your vehicle, please click the link to find the correct contact information for your market.
Your input is valuable in helping us improve our Owner's Manual. Thank you for taking the time to provide your feedback.
North America
| Country | Phone | |
|---|---|---|
| United States | 1-800-392-3673 (FORD) | |
| Canada | 1-800-565-3673 (FORD) | |
| Mexico | 1-800-719-8466 | |
| Guam | 1-800-392-3673 (FORD) | |
| North Mariana Islands | apemcrc@ford.com | |
| Puerto Rico | (800) 841-3673 | prcac@ford.com |
| US Virgin Islands | (800) 841-3673 | prcac@ford.com |
IMG
| Country | Phone | |
|---|---|---|
| Algeria | nafcrc@ford.com | |
| Angola | ssacrc@ford.com | |
| Benin | ssacrc@ford.com | |
| Botswana | ssacrc@ford.com | |
| Burkina FASO | ssacrc@ford.com | |
| Burundi | ssacrc@ford.com | |
| Cameroon | ssacrc@ford.com | |
| Cape Verde | ssacrc@ford.com | |
| Central African Republic | ssacrc@ford.com | |
| Chad | ssacrc@ford.com | |
| Comoros | ssacrc@ford.com | |
| Dem Republic of Congo | ssacrc@ford.com | |
| Djibuti | ssacrc@ford.com | |
| Egypt | nafcrc@ford.com | |
| Equitorial Guinea | ssacrc@ford.com | |
| Eritrea | ssacrc@ford.com | |
| Ethiopia | ssacrc@ford.com | |
| Gabon | ssacrc@ford.com | |
| Gambia | ssacrc@ford.com | |
| Ghana | ssacrc@ford.com | |
| Guinea | ssacrc@ford.com | |
| Guinea-Bissau | ssacrc@ford.com | |
| Ivory Coast | ssacrc@ford.com | |
| Kenya | ssacrc@ford.com | |
| Liberia | ssacrc@ford.com | |
| Libya | nafcrc@ford.com | |
| Madagascar | ssacrc@ford.com | |
| Malawi | ssacrc@ford.com | |
| Mauritania | ssacrc@ford.com | |
| Mauritius | ssacrc@ford.com | |
| Morocco | nafcrc@ford.com | |
| Mozambique | ssacrc@ford.com | |
| Namibia | ssacrc@ford.com | |
| Niger | ssacrc@ford.com | |
| Nigeria | ssacrc@ford.com | |
| Republic of Congo | ssacrc@ford.com | |
| Rwanda | ssacrc@ford.com | |
| Sao Tome and Principe | ssacrc@ford.com | |
| Senegal | ssacrc@ford.com | |
| Sychelles | ssacrc@ford.com | |
| Sierra Leone | ssacrc@ford.com | |
| South Africa | 860011022 | fordcrc2@ford.com |
| South Sudan | ssacrc@ford.com | |
| Swaziland | ssacrc@ford.com | |
| Tanzania | ssacrc@ford.com | |
| Togo | ssacrc@ford.com | |
| Tunisia | nafcrc@ford.com | |
| Uganda | ssacrc@ford.com | |
| Zambia | ssacrc@ford.com | |
| Zimbabwe | ssacrc@ford.com | |
| American Somoa | apemcrc@ford.com | |
| Australia | (13 FORD) 13 3673 | foacust1@ford.com |
| Bangladesh | apemcrc@ford.com | |
| Bhutan | apemcrc@ford.com | |
| Brunei | apemcrc@ford.com | |
| Cambodia | apemcrc@ford.com | |
| Fiji | apemcrc@ford.com | |
| French Polynesia | apemcrc@ford.com | |
| India | apemcrc@ford.com | |
| Indonesia | apemcrc@ford.com | |
| Japan | apemcrc@ford.com | |
| Laos | apemcrc@ford.com | |
| Macao | apemcrc@ford.com | |
| Malaysia | apemcrc@ford.com | |
| Marshall Islands | apemcrc@ford.com | |
| Mongolia | apemcrc@ford.com | |
| Myanmar | apemcrc@ford.com | |
| Nepal | apemcrc@ford.com | |
| New Caledonia | apemcrc@ford.com | |
| New Zealand | 0800 367 369 (FORDNZ) | fnzcust@ford.com |
| Pakistan | apemcrc@ford.com | |
| Palau | apemcrc@ford.com | |
| Papua New Guinea | apemcrc@ford.com | |
| Philippines | 02-88669408 | emailus@ford.com |
| Singapore | apemcrc@ford.com | |
| South Korea | 82-2-1600-6003 | infokr1@ford.com |
| Sri Lanka | apemcrc@ford.com | |
| Tahiti | apemcrc@ford.com | |
| Thailand | 1383 | fordthai@ford.com |
| Timor Leste | apemcrc@ford.com | |
| Vanuatu | apemcrc@ford.com | |
| Vietnam | 1800588888 | fordvn@ford.com |
| Wallis and Futuna | apemcrc@ford.com | |
| Western Somoa | apemcrc@ford.com | |
| Afghanistan | menacac@ford.com | |
| Bahrain | menacac@ford.com | |
| Iraq | menacac@ford.com | |
| Israel | 08-9139995 | service1@kelekmotors.co.il |
| Jordan | menacac@ford.com | |
| Kuwait | 965 1 898900 | menacac@ford.com |
| Lebanon | menacac@ford.com | |
| Oman | menacac@ford.com | |
| Qatar | menacac@ford.com | |
| Saudi Arabia | 8008443673 | menacac@ford.com |
| Syria | menacac@ford.com | |
| United Arab Emirates | 80004441066 | menacac@ford.com |
| Yemen | menacac@ford.com |
Greater China
| Country | Phone | |
|---|---|---|
| China-Imported Vehicles | 400-690-1886 | |
| China-CAF | 951995 | |
| China-JMC | 400-003-1111 | |
| China-Lincoln | 400-988-6789 | |
| Taiwan | 0800-032100 | |
| Hong Kong | (852) 3768-4898 |
South America
| Country | Phone | |
|---|---|---|
| Argentina | 0800-888-3673 | |
| Bolivia | Contact Your Local Ford Distributor | |
| Brazil | 0800-703-3673 | central@ford.com |
| Chile | Contact Your Local Ford Distributor | |
| Colombia | Contact Your Local Ford Distributor | |
| Ecuador | Contact Your Local Ford Distributor | |
| French Guiana | Contact Your Local Ford Distributor | |
| Guyana | Contact Your Local Ford Distributor | |
| Paraguay | Contact Your Local Ford Distributor | |
| Peru | Contact Your Local Ford Distributor | |
| Suriname | Contact Your Local Ford Distributor | |
| Uruguay | Contact Your Local Ford Distributor | |
| Venezuela | Contact Your Local Ford Distributor |
Europe
| Country | Phone | |
|---|---|---|
| Albania | Contact Your Local Ford Distributor | |
| Andorra | Contact Your Local Ford Distributor | |
| Armenia | Contact Your Local Ford Distributor | |
| Austria | 01 20 609 2424 | kundenz@ford.com |
| Azerbaijan | Contact Your Local Ford Distributor | |
| Belarus | Contact Your Local Ford Distributor | |
| Belgium | 32 2 700 67 76 | custfobe@ford.com |
| Bosnia | Contact Your Local Ford Distributor | |
| Bulgaria | Contact Your Local Ford Distributor | |
| Croatia | Contact Your Local Ford Distributor | |
| Cyprus | Contact Your Local Ford Distributor | |
| Czech Republic | 800 3673 29 | zakaznik@ford.com |
| Denmark | 43 68 2000 | crcdk@ford.com |
| Estonia | 372 6710 060 | ford@infoauto.ee |
| Falkland Islands | Contact Your Local Ford Distributor | |
| Finland | 09 725 22022 | palvelut@ford.com |
| France | 0800 005 005 | crcfr@ford.com |
| Georgia | Contact Your Local Ford Distributor | |
| Germany | 0221 9999 2 999 | kunden@ford.com |
| Girbraltar | Contact Your Local Ford Distributor | |
| Greece | 216 900 88 99 | info11@ford.com |
| Hungary | +36 1 7777 555 | Contact Your Local Ford Distributor |
| Iceland | Contact Your Local Ford Distributor | |
| Ireland | 1800 771 199 | crcirela@ford.com |
| Italy | 800 22 44 33 | tu@ford.com |
| Kazakhstan | Contact Your Local Ford Distributor | |
| Latvia | +371 67303020 | |
| Liechtenstein | Contact Your Local Ford Distributor | |
| Lithuania | 370 5216 8226 | forduzklausos@inchcape.lt |
| Luxembourg | +352 248 71 800 | custfobe@ford.com |
| Macedonia | Contact Your Local Ford Distributor | |
| Malta | Contact Your Local Ford Distributor | |
| Moldova | Contact Your Local Ford Distributor | |
| Monaco | Contact Your Local Ford Distributor | |
| Montenegro | Contact Your Local Ford Distributor | |
| Netherlands | 70 7703 777 | klanten@ford.com |
| Norway | 47 66819739 | infonor@ford.com |
| Poland | 48 22 522 27 27 | kontakty@ford.com |
| Portugal | 800 210 373 | clientes@ford.com |
| Romania | 40 312298798 | crcro@ford.com |
| Russia | Contact Your Local Ford Distributor | |
| San Marino | Contact Your Local Ford Distributor | |
| Serbia | Contact Your Local Ford Distributor | |
| Serbia and Montenegro | Contact Your Local Ford Distributor | |
| Slovakia | Contact Your Local Ford Distributor | |
| Slovenia | Contact Your Local Ford Distributor | |
| South Georgia | Contact Your Local Ford Distributor | |
| Spain | 900 80 70 90 | crcspain@ford.com |
| Sweden | 08-593 66 333 | fordkund@ford.com |
| Switzerland | 044 511 14 45 | assistch@ford.com |
| Turkey | Contact Your Local Ford Distributor | |
| Ukraine | Contact Your Local Ford Distributor | |
| United Kingdom | 020 3564 4444 | UKCRC1@ford.com |
Caribbean and Central America
| Country | Phone | |
|---|---|---|
| Anguilla | (313) 594-4857 | expcac@ford.com |
| Antigua | (313) 594-4857 | expcac@ford.com |
| Aruba | (313) 594-4857 | expcac@ford.com |
| Bahamas | (313) 594-4857 | expcac@ford.com |
| Barbados | (313) 594-4857 | expcac@ford.com |
| Bermuda | (313) 594-4857 | expcac@ford.com |
| Bonaire and St. Eustatius | (313) 594-4857 | expcac@ford.com |
| Cayman Islands | (313) 594-4857 | expcac@ford.com |
| Curacao | (313) 594-4857 | expcac@ford.com |
| Dominica | (313) 594-4857 | expcac@ford.com |
| Dominican Republic | (313) 594-4857 | expcac@ford.com |
| Grenada | (313) 594-4857 | expcac@ford.com |
| Haiti | (313) 594-4857 | expcac@ford.com |
| Jamaica | (313) 594-4857 | expcac@ford.com |
| Martinique | (313) 594-4857 | expcac@ford.com |
| Montserrat | (313) 594-4857 | expcac@ford.com |
| St. Kitts and Nevis | (313) 594-4857 | expcac@ford.com |
| St. Lucia | (313) 594-4857 | expcac@ford.com |
| St. Martin | (313) 594-4857 | expcac@ford.com |
| St. Vincent and the Grenadines | (313) 594-4857 | expcac@ford.com |
| Trinidad and Tobago | (313) 594-4857 | expcac@ford.com |
| Turks and Caicos | (313) 594-4857 | expcac@ford.com |
| British Virgin Islands | (313) 594-4857 | expcac@ford.com |
| Netherlands Antilles | (313) 594-4857 | expcac@ford.com |
| Belize | (313) 594-4857 | expcac@ford.com |
| Costa Rica | (313) 594-4857 | expcac@ford.com |
| El Salvador | (313) 594-4857 | expcac@ford.com |
| Guatemala | (313) 594-4857 | expcac@ford.com |
| Honduras | (313) 594-4857 | expcac@ford.com |
| Nicaragua | (313) 594-4857 | expcac@ford.com |
| Panama | (313) 594-4857 | expcac@ford.com |