Issue:
Some 2021 Bronco vehicles may experience a water leak that originates from the left and/or right A-Pillars and/or the windshield header. This may be due to excessive gaps in the body seams from the factory. To correct the condition, follow the Service Procedure to reseal the affected body gaps and replace the front header seal.
Action:
Follow the Service Procedure steps to correct the condition if the vehicle meets all of the following criteria:
•
2021 Bronco
•
Water leak originating from one of the following:
-
Left A-pillar
-
Right A-pillar
-
Windshield header
Quantity refers to the amount of the service part number required to repair the vehicle. As Needed indicates the amount of the part may vary and/or is not a whole number. Parts can be billed out as non-whole numbers, including less than 1. Warranty Status: Eligible under provisions of New Vehicle Limited Warranty (NVLW)/Service Part Warranty (SPW)/Service Part New Vehicle (SPNV)/Extended Service Plan (ESP) coverage. Limits/policies/prior approvals are not altered by a TSB. NVLW/SPW/SPNV/ESP coverage limits are determined by the identified causal part and verified using the OASIS part coverage tool. | Description | Operation No. | Time | | 2021 Bronco: Replace The Header Seal Following The Service Procedure (Do Not Use With Any Labor Operations Outside Of This Article) | 212403A | 2.7 Hrs. | | Additional Time To Remove And Install The Roof Rack If Equipped (Can Be Claimed With Operation A) | 212403B | 0.3 Hrs. | | Additional Time To Service Carpet For Dampness And/Or Odor (Can Be Claimed With Operation A) | MT212403 | Actual Time |
| Causal Part: | 7803110 | | Condition Code: | 01 |
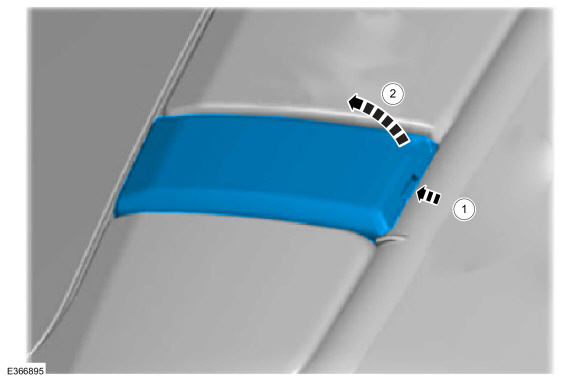
1. Remove both windshield trim covers by pressing the button on the rear of the cover and rotating it forward. If a roof rack is installed on the vehicle, it will need to be removed using the assistance of a second person. Refer to the vehicle’s Digital Owner’s Manual for removal instructions. (Figure 1)
Figure 1
2. Remove/retract the front roof sections.
(1). Vehicles equipped with a hard top roof, remove only the front 2 sections covering the driver and passenger seats. Refer to the Digital Owner’s Manual, Removable Vehicle Components > Removable Hard Top > Removing and Installing the Hard Top.
(2). Vehicles equipped with a soft top roof, place it in the partially open position. Refer to the Digital Owner’s Manual, Removable Vehicle Components > Removable Soft Top > Opening and Closing the Soft Top.
3. Remove the windshield header trim panel. Refer to Workshop Manual (WSM), Section 501-05, Interior Trim and Ornamentation > Removal and Installation > Windshield Header Trim Panel.
4. Remove the header seal.
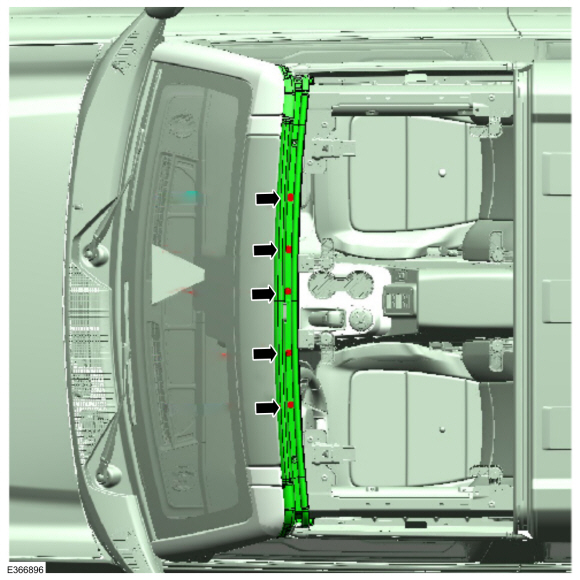
(1). Remove the 5 center bolts and nuts securing the header seal to the body. (Figure 2)
Figure 2
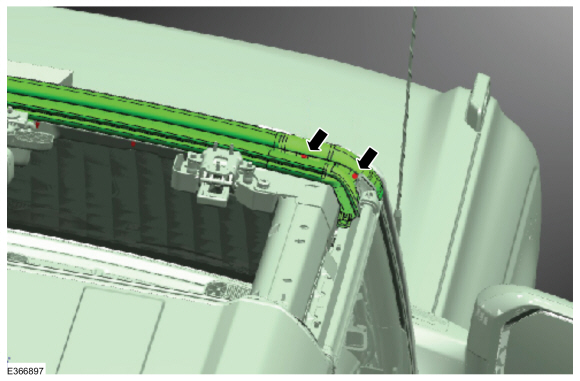
(2). Remove the 4 bolts (2 on each side) securing the header seal to the body. (Figure 3)
Figure 3
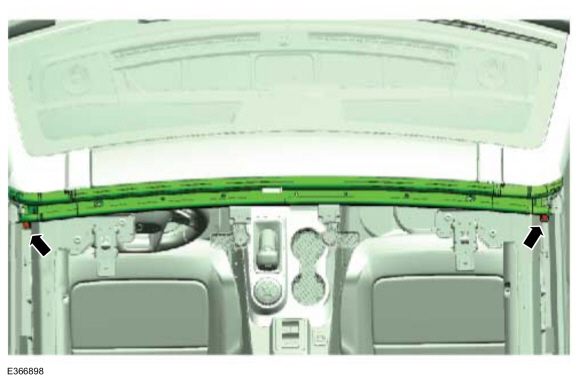
(3). Remove the 2 pushpin fasteners (1 on each end). (Figure 4)
Figure 4
(4). Remove the header seal from the vehicle.
5. Clean the header seal mating surface on the body by removing all residual sealer left over from the old header seal. Use a plastic scraper and isopropyl alcohol wipes to clean the surface without harming the painted surface. If any painted surfaces are scratched during the cleaning process, touch up these areas with paint (covering any exposed metal) prior to proceeding.
6. Follow the instructions on the container to apply 3M™ Strip-Calk to the exposed body seams starting at the roof rack trim cover area and ending at the corner seal where the body seam ends. Do not leave a gap between the edge of the caulk and the corner seal. (Figures 5-8)
Figure 5
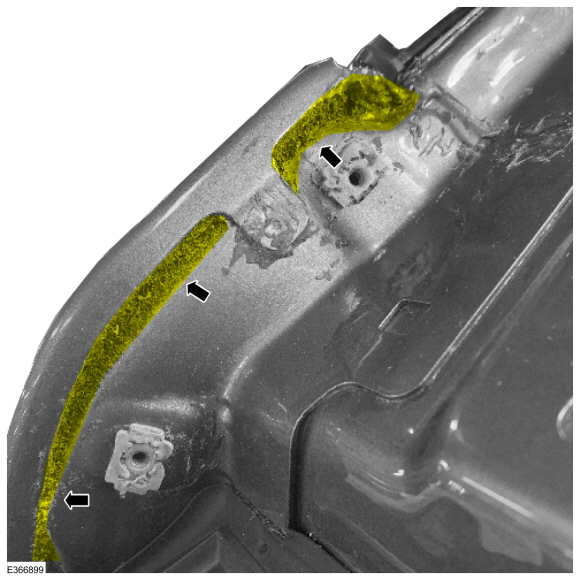
Figure 6
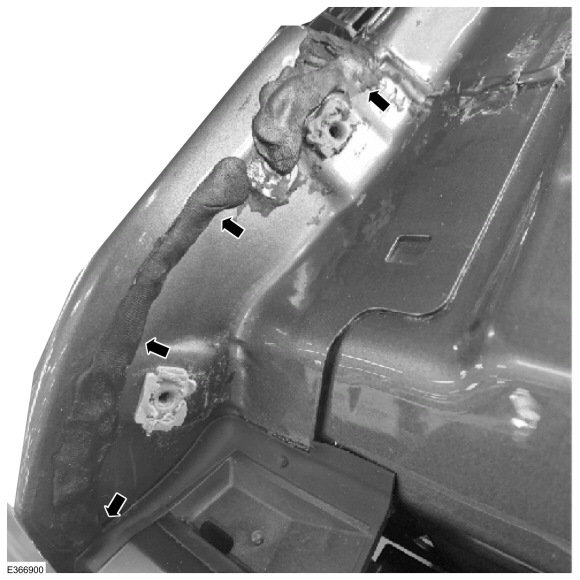
Figure 7
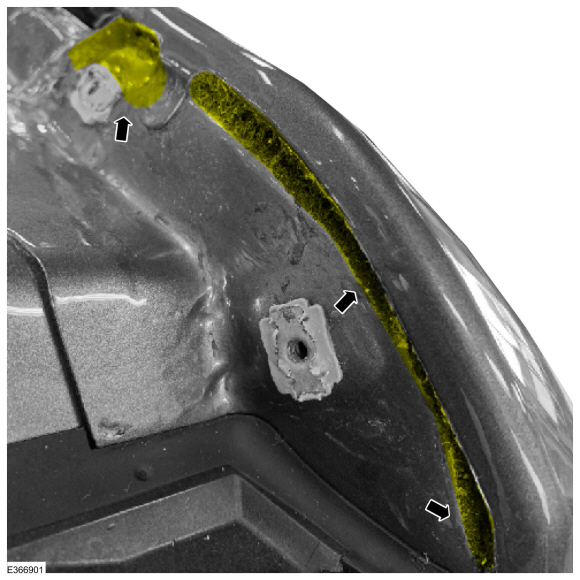
Figure 8
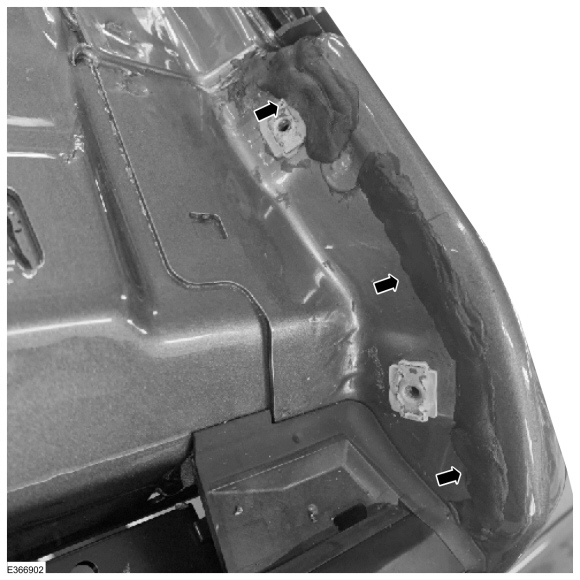
7. Peel the plastic backing from the new header seal to expose the bottom sticky surface applied by the manufacturer.
8. Carefully install the header seal on the vehicle ensuring all attachment holes line up to the vehicle attachment points.
9. Install all header seal attachments.
(1). Tighten the 5 center bolts and nuts securing the header seal to the body to 9 Nm (80 lb-in). (Figure 2)
(2). Tighten the 4 bolts (2 on each side) securing the header seal to the body to 3 Nm (26 lb-in). (Figure 3)
(3). Install the 2 pushpin fasteners, 1 located at each end. (Figure 4)
10. Inspect the header seal to body surface by lightly pulling up on the edges of header seal. If any gaps are found in the sealing surface, fill the gaps using 3M™ Strip-Calk.
NOTE: The header seal must be completely sealed to the body. Any gaps between the header seal and body may result in further water leaks.
11. Install the windshield header trim panel. Refer to WSM, Section 501-05, Interior Trim and Ornamentation > Removal and Installation > Windshield Header Trim Panel.
12. Pull/remove the cord that runs along the inside of the header seal groove.
13. Install both windshield trim covers. If a roof rack was installed on the vehicle, it will need to be reinstalled with the assistance of a second person. Refer to the vehicle’s Digital Owner’s Manual for installation instructions. (Figure 1)
14. Return the roof to a fully closed position. Refer to Step 2 for roof operating instructions.
15. If equipped, inspect the carpet for dampness and/or odor and service as necessary.
|